The Epson RX560 Resetter is an adjustment program software created for the primary purpose of resetting the Waste Ink Pad counter on the Epson Stylus Photo RX560 printer. By using this resetter, you will be able to perform maintenance at home if your printer is unable to be used and gives warnings such as ‘Service required’ and the like.
Below, we will discuss how to use the Epson RX560 Resetter and where you can download it. In addition, we will provide some information about the use of the resetter to minimize the risks associated with its use.
Table of Contents
- What is the Epson RX560 Waste Ink Counter Problem?
- How to Reset Safely
- How to Use Epson RX560 Resetter
- Download Epson RX560 Resetter Here
What is the Epson RX560 Waste Ink Counter Problem?
The Epson RX560, like all Epson inkjet printers, contains an internal counter that tracks how much ink has been used during cleaning cycles, print head alignment, and normal printing operations. This waste ink is collected in absorbent pads inside the printer to prevent it from spilling onto your desk or damaging internal components.
When this counter reaches a predetermined limit, typically after several thousand pages of printing, your printer will display an error message stating that the ink pads are at the end of their service life or service required. The printer will then refuse to print, scan, or perform any functions until this issue is resolved. This is a built-in safety feature designed to prevent ink overflow, but it can be frustrating when your printer suddenly stops working.
How to Reset Safely
To safely reset, make sure that the Maintenance Box/Waste Ink Pad has been physically replaced, cleaned, or at least checked before the reset process. This is to ensure that the hardware is not in a condition of excessively holding printer waste ink, so that when the reset process occurs, your printer will be safe and will not cause ink to leak out of the printer.
Do not keep resetting without replacing the hardware, as it may cause the ink to seep out and dirty your workspace.
How to Use Epson RX560 Resetter
1. Before downloading and using the resetter, make sure to temporarily disable the antivirus to ensure the reset process runs safely. Also, ensure that the printer is connected to the computer that will be used for the reset.
2. You can download the Epson RX560 resetter through the link below this article.
3. After downloading your resetter file, please extract the file by right-clicking on it and selecting Extract All.
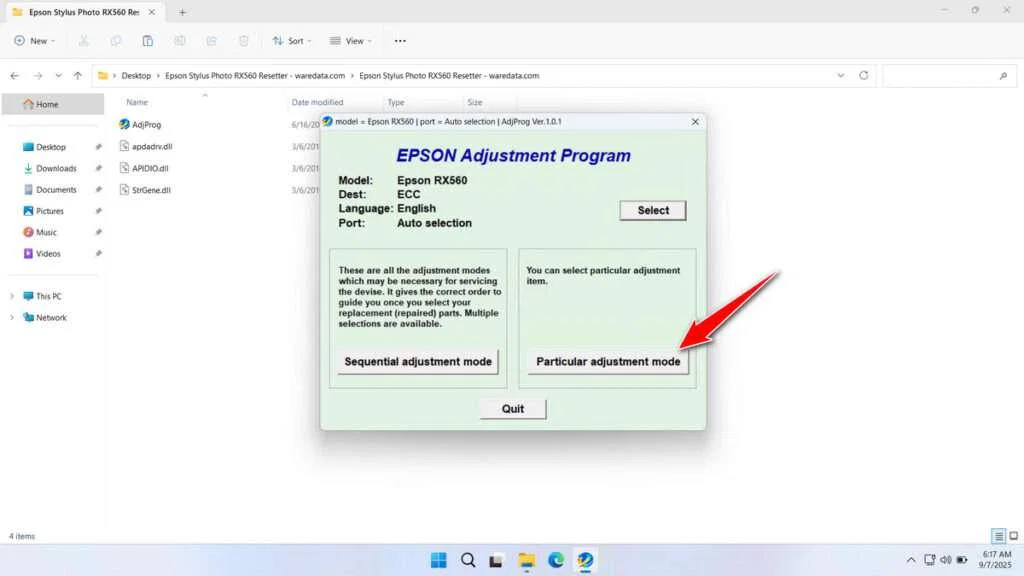
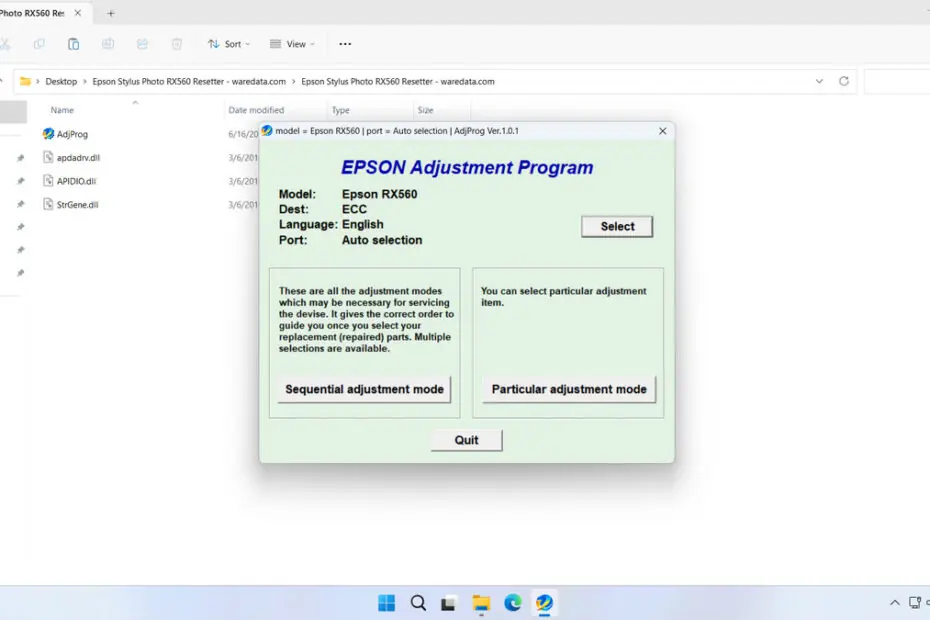
4. Open the extracted resetter folder, then run the AdjProg.exe file.
5. Click on Particular adjustment mode.

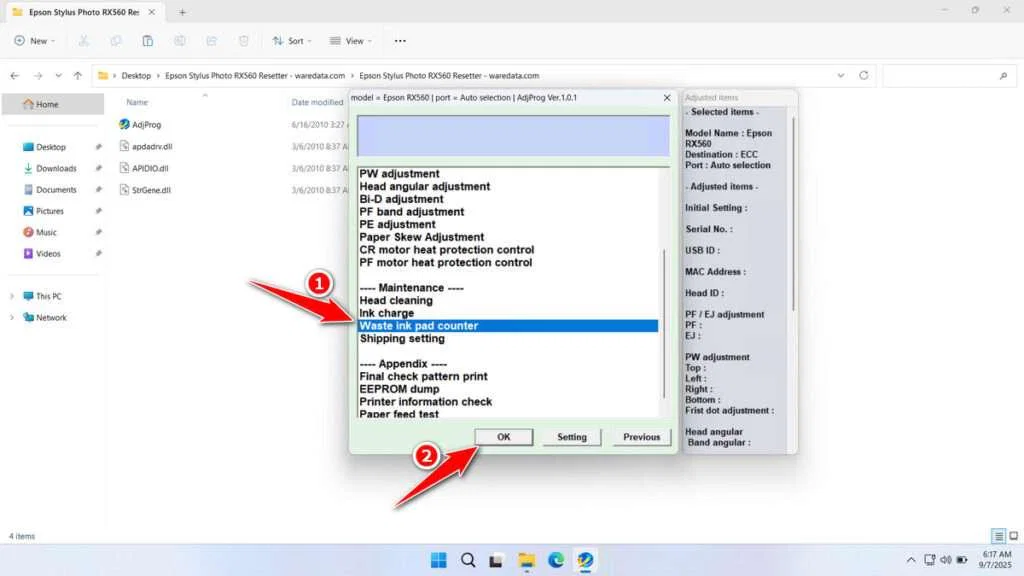
6. Select the Waste ink pad counter and click OK.

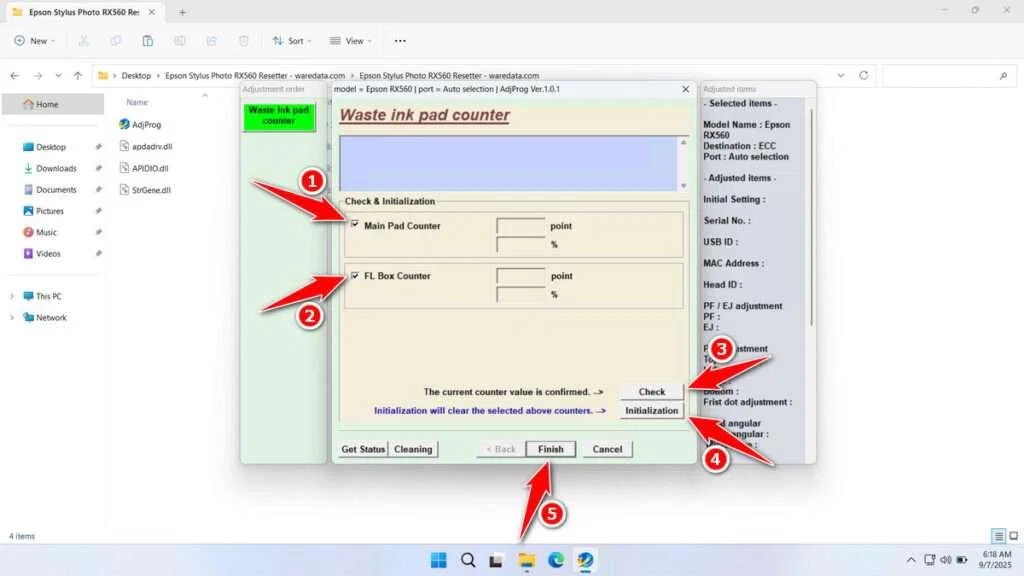
7. Tick the Main Pad Counter and FL Box Counter, then click the Check button, and then click Initialization. After the reset is successful, click Finish. Please turn off the printer, then you can turn your printer back on and use it again later.

8. If the reset fails, try moving the printer’s USB cable to another available port on your computer and repeat the reset process.
Download Epson RX560 Resetter Here
The resetter does not physically empty the waste ink pads. Continually resetting the counter without ever physically inspecting or replacing the full pads can lead to ink leakage, causing severe internal damage to your printer.
For those of you who already understand how to use the Epson RX560 Resetter and minimize the risks, you can use the resetter with full consideration. For those who need the Epson RX560 Resetter, you can download it through the following link.
File Size: 0.9MB
File Type: .ZIP
OS Support: Windows 7/8/10/11 or higher
Maybe you would like other interesting articles?

