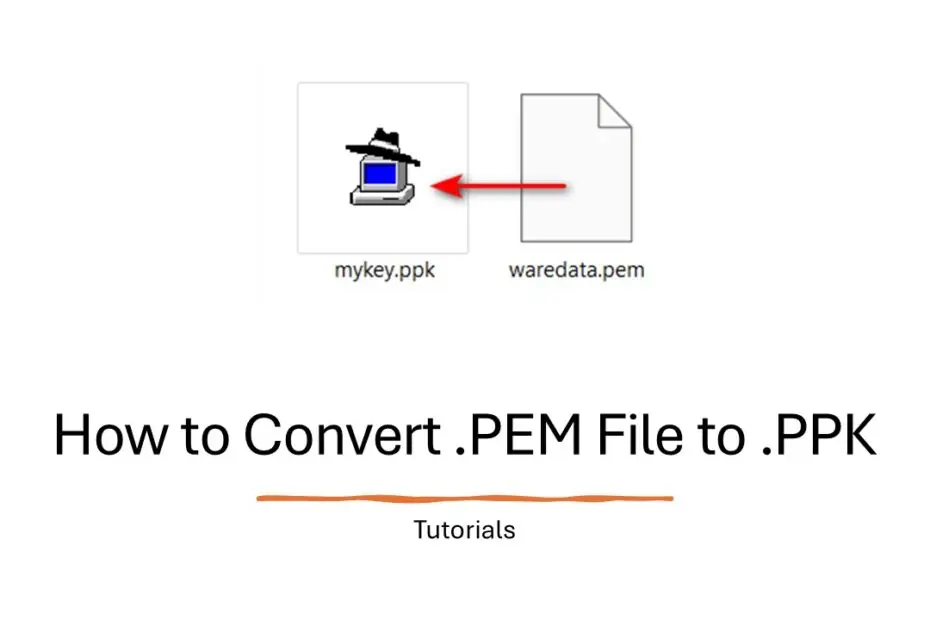
Have you ever had a case where you wanted to remote into a server using the PuTTY application due to its ease of use? The problem is when your server requires a private key for remote access, but the VPS/VM provider only provides the private key in .PEM file format, while PuTTY only supports private keys in .PPK file format.
The easiest way is to convert the .PEM file to .PPK file using the PuTTY tool itself. How to do that? Below, we will provide you with a guide on how you can easily convert a .PEM file to .PPK using a tool called PuTTYgen.
Table of Contents
- What are .PEM and .PPK Files?
- Why Convert .PEM to .PPK?
- Prerequisites for Conversion
- How to Convert .PEM File to .PPK using PuTTYgen
What Are .PEM and .PPK Files?
A PEM (Privacy-Enhanced Mail) file is like a universal translator in the world of cryptographic keys. Originally designed for secure email, PEM has become the standard format for storing and transmitting cryptographic keys and certificates. These files contain base64-encoded data wrapped between distinctive header and footer lines, making them easily readable and transferable across different systems. When you generate an SSH key pair on most Unix-like systems or cloud platforms like AWS, you typically receive a PEM file.
The PPK (PuTTY Private Key) format, on the other hand, is specifically designed for PuTTY, one of the most popular SSH clients for Windows. This format stores the same cryptographic information as a PEM file but organizes it in a way that PuTTY can quickly read and process.
Why Convert .PEM to .PPK?
The need for conversion typically arises from compatibility requirements rather than security concerns. Imagine you’re a developer who receives a PEM key from AWS for accessing your EC2 instances, but you prefer using PuTTY for your SSH connections. Without conversion, it’s like trying to play a DVD in a Blu-ray player – the information is there, but the format isn’t compatible.
Cloud services like Amazon Web Services, Google Cloud Platform, and Microsoft Azure typically provide keys in PEM format because it’s the industry standard. However, if you’re working on a Windows machine and prefer PuTTY’s interface and features, you’ll need to convert these keys to PPK format. Additionally, some automated deployment scripts and configuration management tools specifically require PPK format for their operations.
Prerequisites for Conversion
- A valid .pem file (e.g., waredata.pem).
- PuTTYgen: A free key generator tool for PuTTY. Download here.
- Basic familiarity with SSH key concepts.
How to Convert .PEM File to .PPK using PuTTYgen
1. After you download PuTTYgen, please install the application by double-clicking it, and follow the instructions that appear on the screen until the installation is complete.
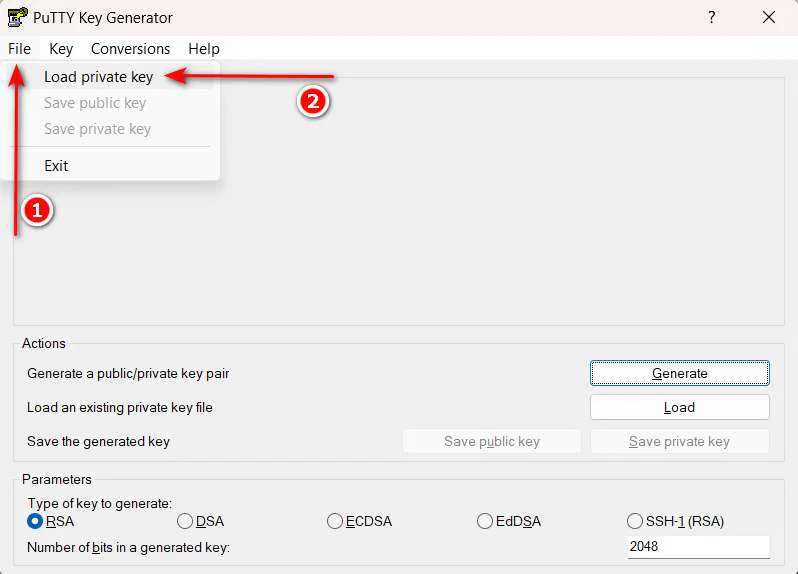
2. Open your PuTTYgen application. Click on File and then select Load private key.
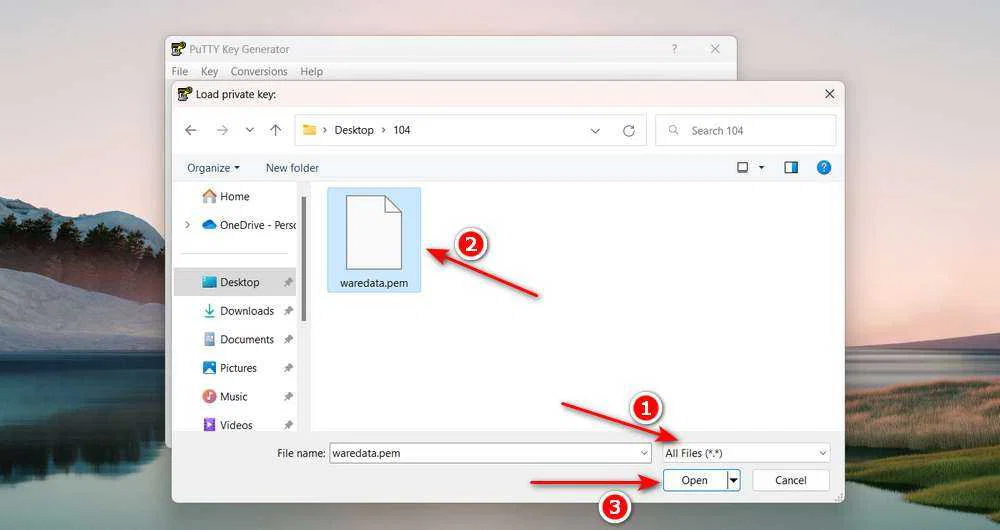
3. Select the file extension to All files (*.*), so that the .PEM file can be detected. After that, select the .PEM file that will be converted, then click Open.
4. If the .PEM file you selected is valid, a success message will appear as follows. Just click OK.
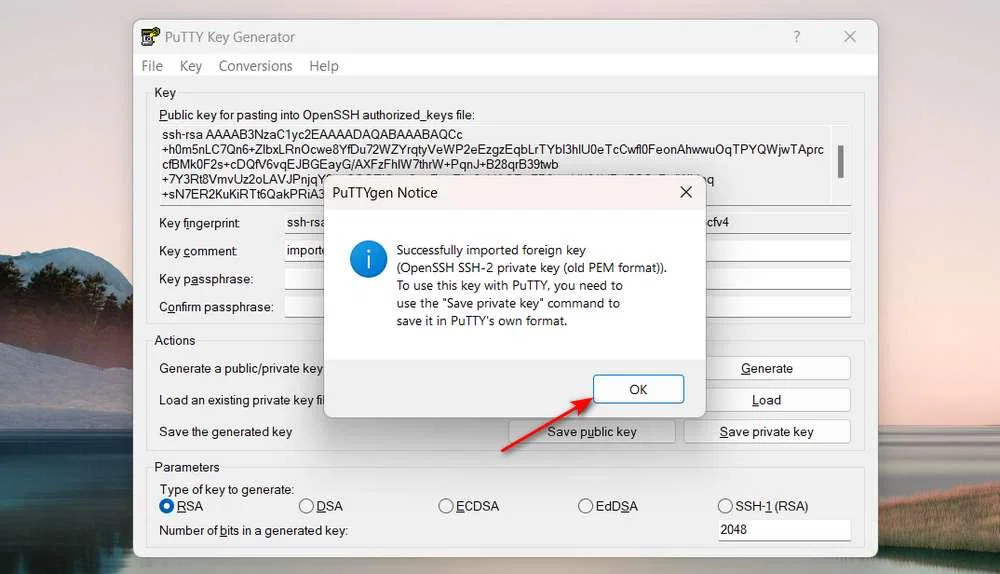
5. Then to convert to .PPK file, click the Save private key button.
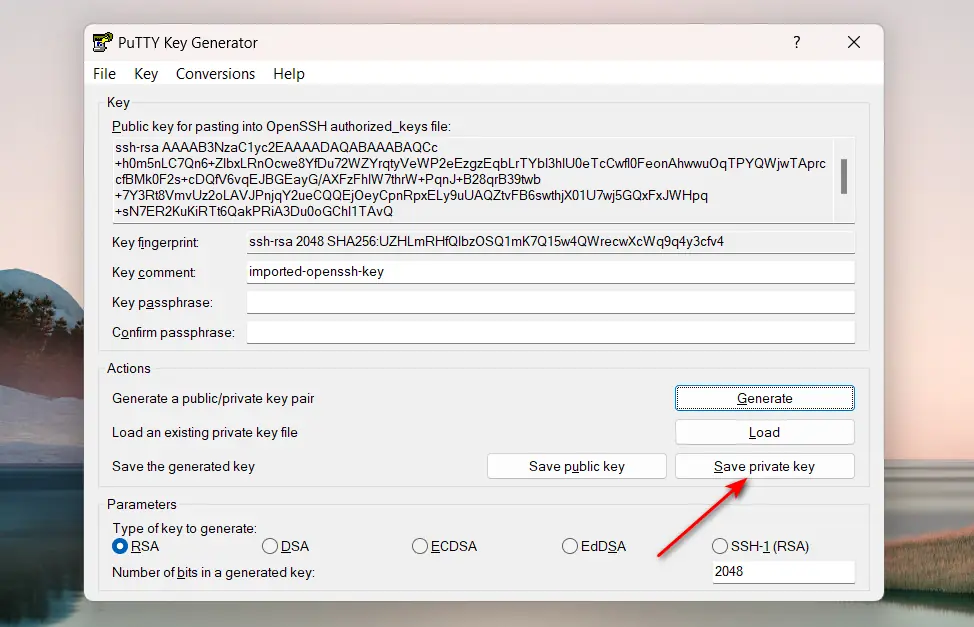
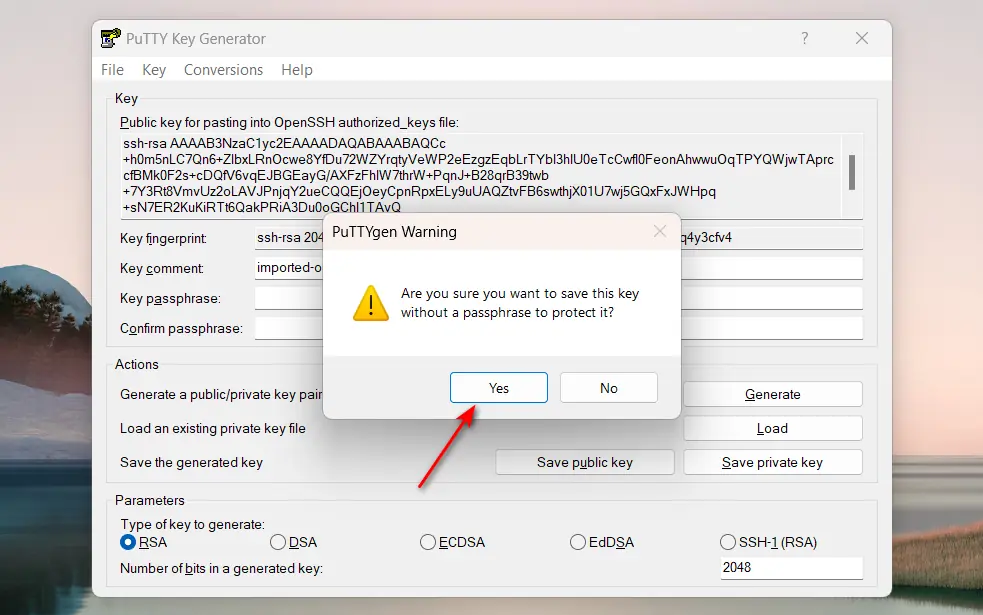
6. If you directly convert the file without entering a passphrase in the Key passphrase and Confirm passphrase fields, a warning will appear; just click Yes to continue.
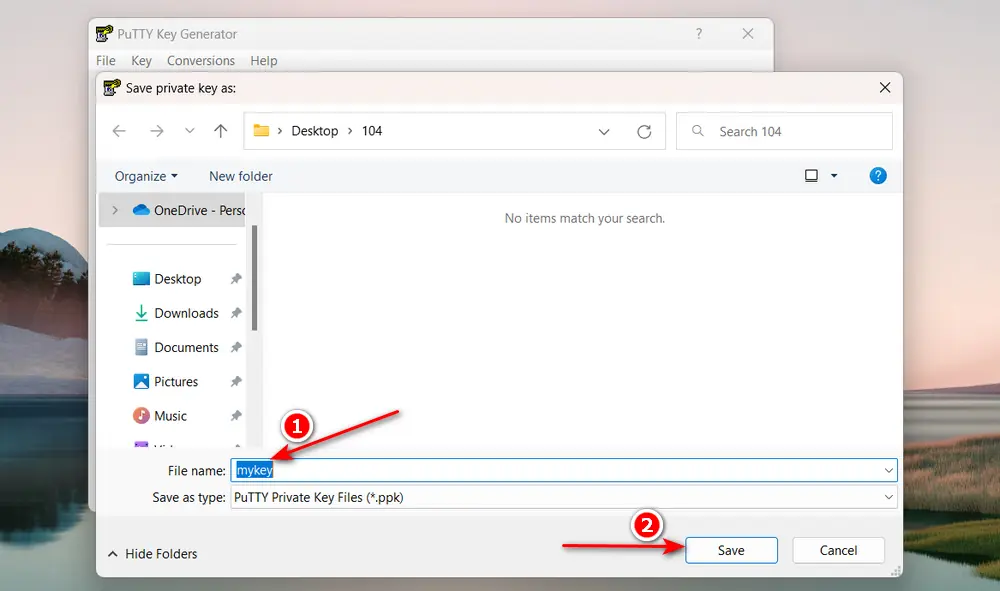
7. Name your .PPK file (whatever you like), then click Save.
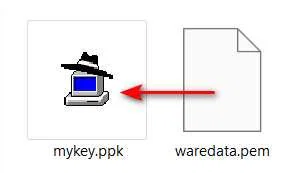
8. Your .PEM file has been successfully converted to a .PPK file. Now you can use it to remotely access your server using PuTTY.
In fact, in addition to using the PuTTYgen application, you can also use other online tools. However, since PuTTYgen itself is very popular, its security and privacy can be better maintained, especially when converting it offline, so you don’t have to worry about your private key file being spread online.
Maybe you would like other interesting articles?

