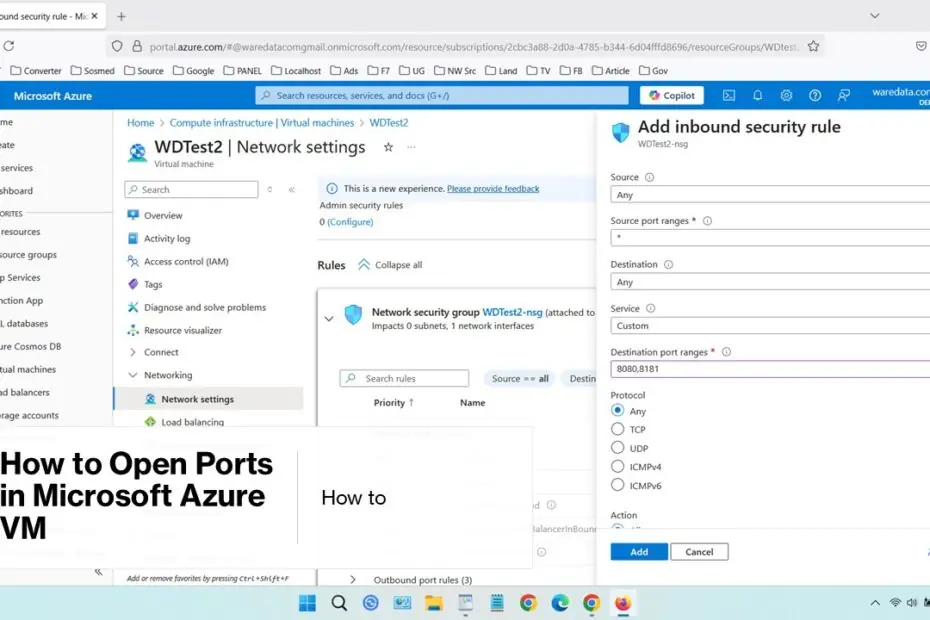
Before diving into the practical steps of opening ports, it’s crucial to understand how Azure handles network security. Think of Azure’s network security as a series of layered checkpoints, much like security gates at an airport. Each layer serves a specific purpose in protecting your virtual machines from unauthorized access. So, for the sake of security, Microsoft Azure by default closes almost all ports; that’s why we will learn how to open certain ports there.
In this guide, you will learn the precise steps to open ports in a Microsoft Azure VM, including configuring Network Security Groups (NSGs), setting firewall rules, and verifying your setup. By the end of this article, you’ll have the confidence to modify your Azure VM network settings effectively, keeping your environment safe yet accessible.
Table of Contents
- Understanding Network Security Groups (NSGs)
- Prerequisites and Preparation
- How to Open Ports on an Azure VM Using Azure Portal
- Verifying Your Port Configuration
Understanding Network Security Groups (NSGs)
In Azure, ports are opened or closed using Network Security Groups (NSGs). Think of an NSG as a firewall specifically for your Azure network resources. It contains security rules that allow or deny inbound (to the VM) and outbound (from the VM) network traffic based on source/destination IP addresses, ports, and protocols.
- Inbound Rules: Control traffic coming into your VM (e.g., HTTP on port 80, SSH on port 22).
- Outbound Rules: Control traffic leaving your VM.
- Each rule specifies priority, source, destination, port, protocol, and action (Allow/Deny).
By default, Azure VMs have restrictive NSG rules blocking most inbound traffic. Opening a port means creating an Allow rule in the NSG associated with your VM or its subnet.
Prerequisites and Preparation
Before you begin opening ports in your Azure VM, you’ll need to ensure you have the proper permissions and understanding of your network architecture. You must have either Owner, Contributor, or Network Contributor permissions on the Azure subscription or resource group containing your virtual machine.
It’s also important to identify exactly which ports you need to open and why. Common scenarios include opening port 80 for HTTP traffic, port 443 for HTTPS, port 22 for SSH access to Linux VMs, or port 3389 for RDP access to Windows VMs. However, remember that opening ports creates potential security vulnerabilities, so you should only open the ports that are absolutely necessary for your application to function.
Take time to document your current network configuration before making changes. This includes noting existing NSG rules, understanding your virtual network topology, and identifying which subnets your VMs are connected to. This preparation will help you avoid conflicts and make troubleshooting easier if issues arise.
How to Open Ports on an Azure VM Using Azure Portal
The Azure Portal provides a user-friendly interface to manage network security rules.
Step-by-step Process:
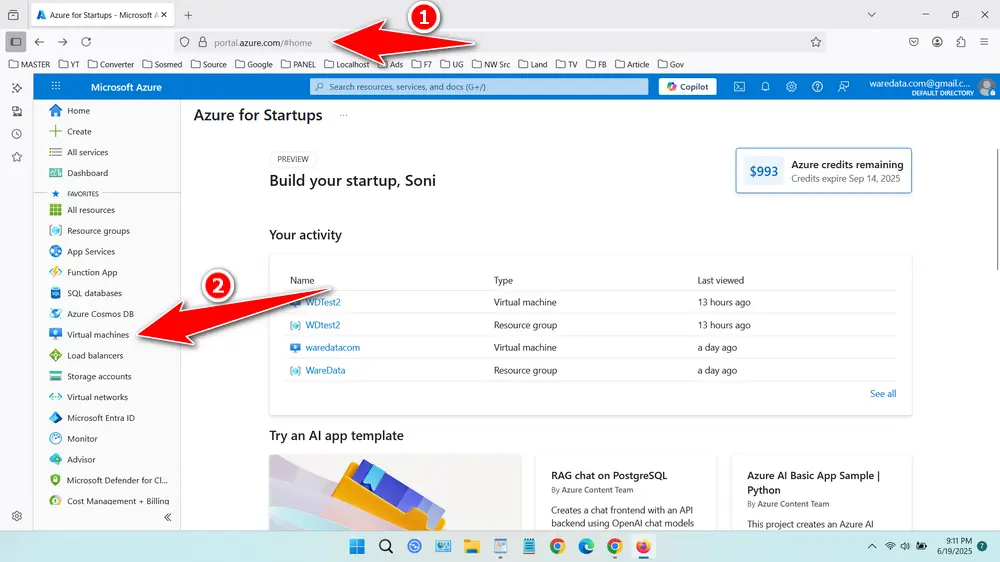
- Log in to the Azure Portal at portal.azure.com.
- Navigate to “Virtual Machines”.
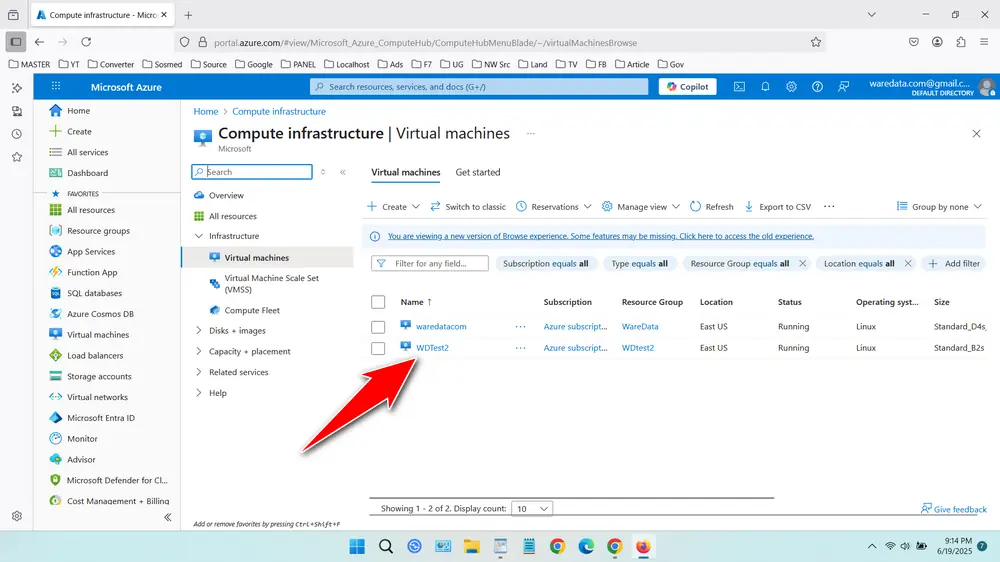
- Select your VM, in this case we choose ‘WDTest2’.
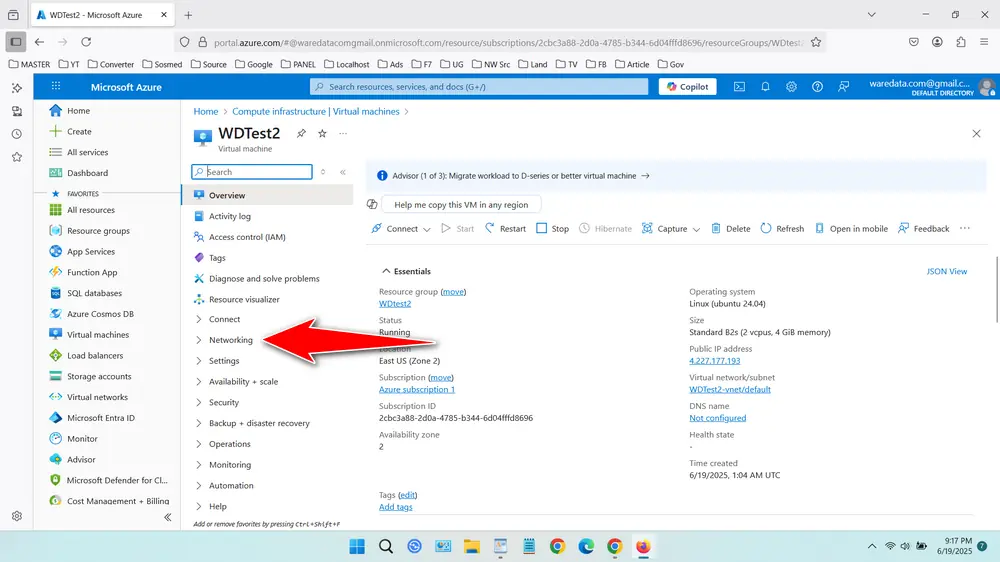
- In the VM’s overview, scroll down and select “Networking” above Settings.
- In ‘Network security group’ select ‘+ Create Port rule’, then choose “Inbound port rules”.
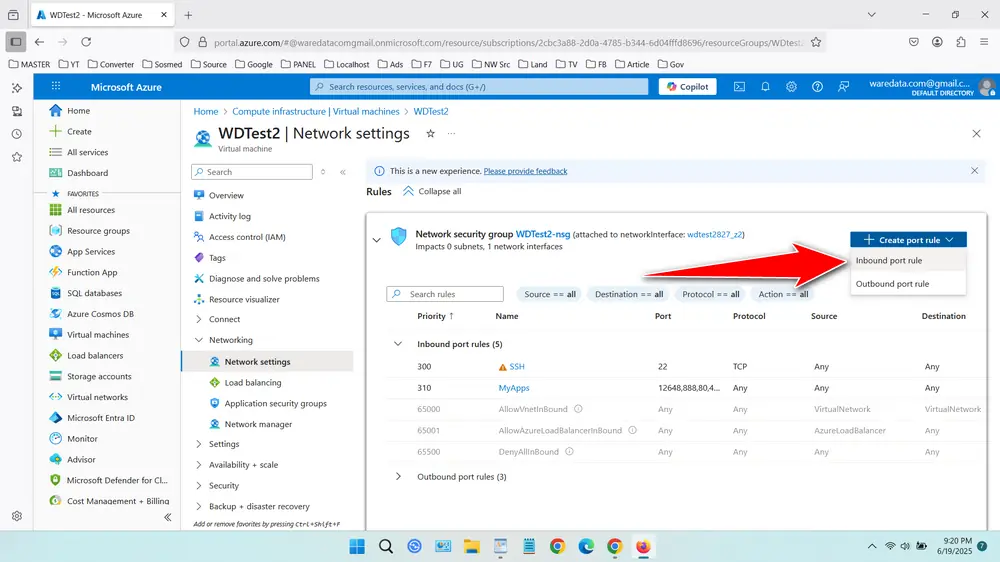
- Fill in the rule details:
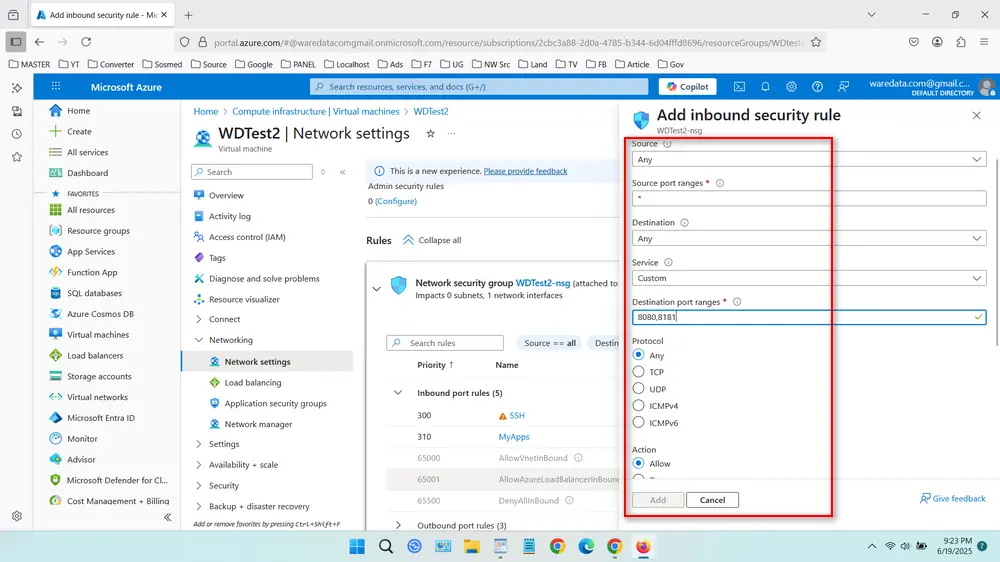
- Destination Port Ranges: Enter the port number you want to open (e.g., 8080,8181), more than one port is separated by a comma.
- Protocol: Select TCP, UDP, or Any depending on your need.
- Action: Keep as Allow.
- Priority: Assign a value; lower numbers have higher priority.
- Name: Provide a descriptive name for the rule.
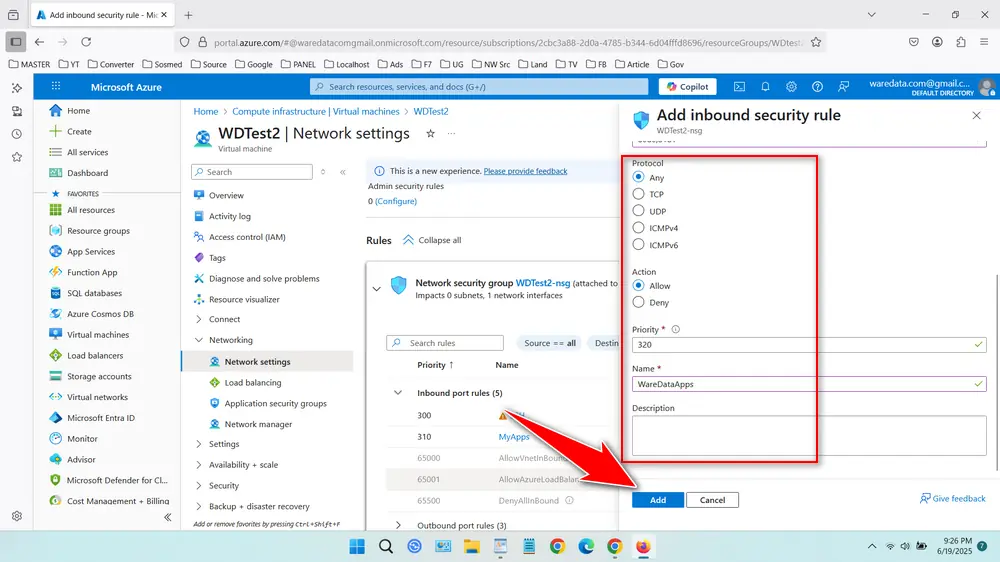
- Click “Add” to apply the rule. The port is now open for inbound traffic.
Verifying Your Port Configuration
- Azure Portal Check: Go back to your VM’s “Networking” tab. Ensure your new rule is listed under “Inbound port rules” with the correct details.
- Test Connectivity:
- Try connecting to your application/service using the VM’s public IP address (or DNS name) and the opened port (e.g., open
http://<your-vm-public-ip>in a browser for port 80). - Use command-line tools like
telnet <public-ip> <port>(Windows) ornc -zv <public-ip> <port>(Linux/macOS). A successful connection indicates the port is open. A timeout or refusal likely indicates a misconfiguration or a firewall on the VM OS itself blocking the traffic.
- Try connecting to your application/service using the VM’s public IP address (or DNS name) and the opened port (e.g., open
- VM OS Firewall: Remember! Azure NSGs are external firewalls. You must also ensure the firewall on the VM’s operating system (Windows Firewall,
iptables/ufwon Linux) allows traffic on the desired port. An NSG rule allows traffic to the VM, but the OS firewall must allow it through to the application.
Opening ports in a Microsoft Azure VM is a straightforward but critical task. By using Network Security Groups wisely, you can control traffic flow while keeping your infrastructure secure. Always balance accessibility and security by applying the principle of least privilege when configuring port access.
For advanced security, consider integrating Azure Firewall or Application Gateway for more granular control and monitoring.
Maybe you like other interesting articles?

