Self-signed certificates are very useful, especially for application and website developers, to test the applications they have created before launch to see whether they work properly when using certificates.
Original certificates that are globally trusted are quite expensive, especially for new developers or individuals. That is why self-signed certificates are very useful for this category of developers.
Below, we will explain in more detail about self-signed certificates, how to create them on Windows 11, and what their benefits are.
Table of Contents
- What is a Self-Signed Certificate?
- The Advantages of Using a Self-Signed Certificate
- How to Create Self-Signed Certificate in Windows 11
- The Major Disadvantages and Security Risks
What is a Self-Signed Certificate?
A self-signed certificate is a digital identity certificate that is signed by the same entity whose identity it certifies. In simpler terms, instead of a trusted external organization like Comodo, DigiCert, or GlobalSign vouching for your server’s identity, you are vouching for yourself. It creates a public-private key pair and then signs the certificate with its own private key, effectively acting as its own Certificate Authority (CA). While it provides the same level of encryption as a CA-signed certificate, it completely bypasses the third-party validation process.
The Advantages of Using a Self-Signed Certificate
Despite the trust issue, because it is not issued by a trusted Certificate Authority, self-signed certificates offer several key benefits:
- Cost-Effective: They are completely free. There are no fees to purchase or renew.
- Immediate Issuance: You can create and deploy one in minutes, without waiting for a CA’s validation process.
- Full Control: You have complete autonomy over the certificate’s lifecycle without relying on an external provider.
- Ideal for Internal Networks: Perfect for encrypting traffic within a controlled environment like a company intranet, development, or testing servers where domain validation by a public CA is unnecessary.
How to Create Self Signed Certificate in Windows 11
In Windows 11, we can create a self-signed certificate quite easily using scripts and PowerShell ISE. You can carefully follow the guide below.
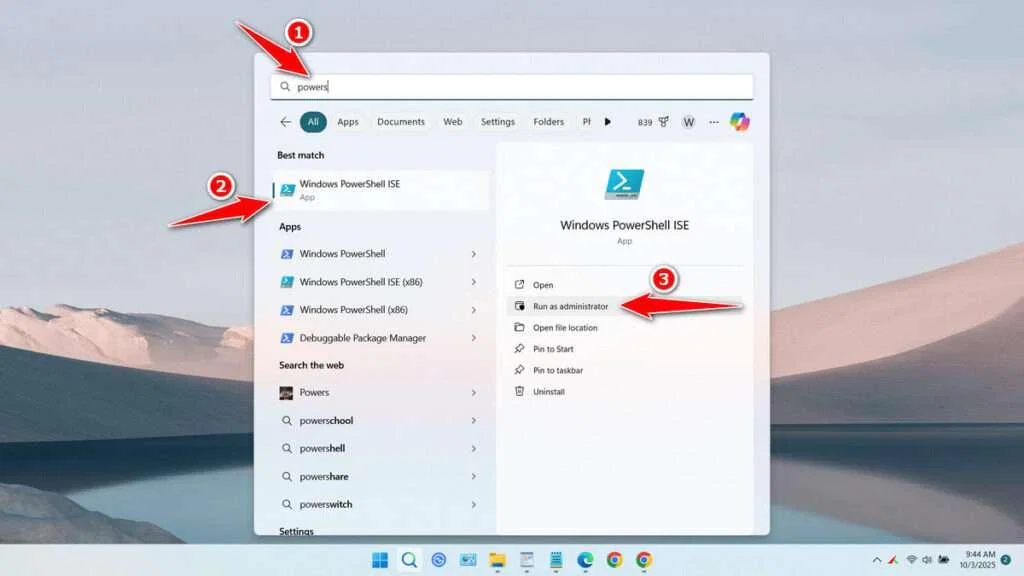
1. Open Windows PowerShell ISE and run it as Administrator.

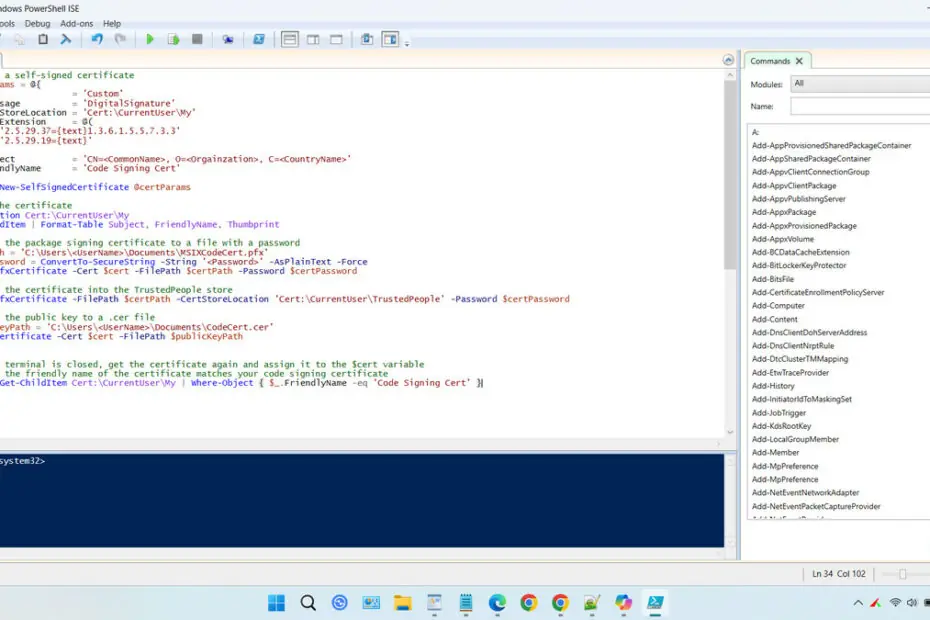
2. Copy the following script and also change <UserName> in the path to match your computer username, then also change <Password> to the password you want. You can also change the CN=<CommonName>, O=<Organization>, C=<CountryName> parts according to your identity details, but it can also be left as the default.
# Create a self-signed certificate
$certParams = @{
    Type              = 'Custom'
    KeyUsage          = 'DigitalSignature'
    CertStoreLocation = 'Cert:\CurrentUser\My'
    TextExtension     = @(
        '2.5.29.37={text}1.3.6.1.5.5.7.3.3'
        '2.5.29.19={text}'
    )
    Subject           = 'CN=<CommonName>, O=<Orgainzation>, C=<CountryName>'
    FriendlyName      = 'Code Signing Cert'
}
$cert = New-SelfSignedCertificate @certParams

# View the certificate
Set-Location Cert:\CurrentUser\My
Get-ChildItem | Format-Table Subject, FriendlyName, Thumbprint

# Export the package signing certificate to a file with a password
$certPath = 'C:\Users\<UserName>\Documents\MSIXCodeCert.pfx'
$certPassword = ConvertTo-SecureString -String '<Password>' -AsPlainText -Force
Export-PfxCertificate -Cert $cert -FilePath $certPath -Password $certPassword

# Import the certificate into the TrustedPeople store
Import-PfxCertificate -FilePath $certPath -CertStoreLocation 'Cert:\CurrentUser\TrustedPeople' -Password $certPassword

# Export the public key to a .cer file
$publicKeyPath = 'C:\Users\<UserName>\Documents\CodeCert.cer'
Export-Certificate -Cert $cert -FilePath $publicKeyPath


# If the terminal is closed, get the certificate again and assign it to the $cert variable
# Verify the friendly name of the certificate matches your code signing certificate
$cert = Get-ChildItem Cert:\CurrentUser\My | Where-Object { $_.FriendlyName -eq 'Code Signing Cert' }
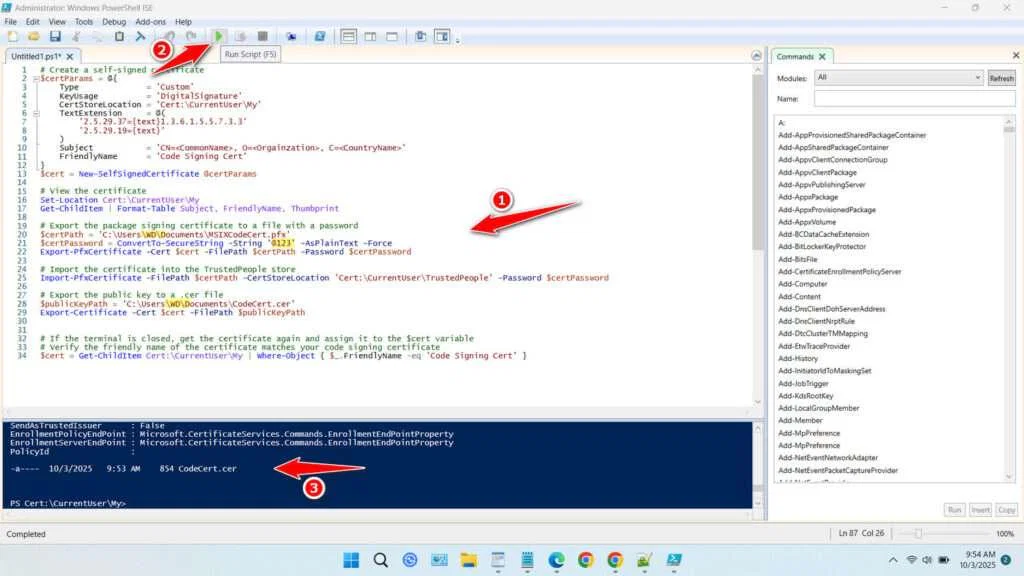
3. Paste the script that has been edited into the Windows PowerShell ISE terminal. Run the script, and see the message below to check whether it succeeded or encountered an error. If there is an error, you can fix it first and then run it again.

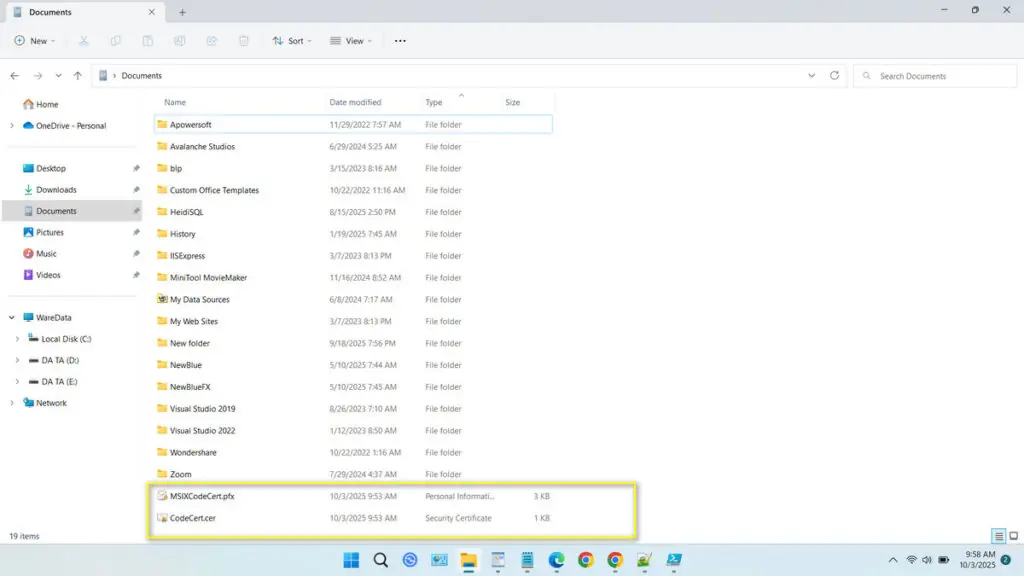
4. If successful, two files will be created in your Documents folder with the extensions .pfx and .cer. You can install the .pfx file in the application you are developing, and install the .cer file on the computer where the application is running.

5. Don’t forget to save the password because if you forget it, the certificate cannot be used.
The Major Disadvantages and Security Risks
- Lack of Trust: The most prominent issue is the browser security warning. Users will see messages like “Your connection is not private” or “NET::ERR_CERT_AUTHORITY_INVALID,” which can erode confidence and prevent access. Or if the application is going to be installed, an untrusted application warning will appear.
- No Third-Party Validation: A CA verifies that the applicant controls the domain or application and, for higher assurance certificates, validates the organization’s legal existence. A self-signed certificate has no such validation, making it easy for anyone to create a certificate claiming to be any website, facilitating potential man-in-the-middle (MitM) attacks.
- Certificate Management Overhead: In an organization, you must manually distribute and install your self-signed root certificate on every device and application that needs to trust it. This becomes a significant administrative burden as your infrastructure grows.
- No Automatic Revocation: Public CAs maintain Certificate Revocation Lists (CRLs) and Online Certificate Status Protocol (OCSP) responders to quickly invalidate compromised certificates. Self-signed certificates lack this infrastructure, making revocation difficult.
Therefore, if you already have a lot of money, we recommend buying certificates from trusted providers such as DigiCert, Comodo, GlobalSign, and so on, so that the applications you develop are automatically considered trustworthy on all devices used to run them.
Maybe you would like other interesting articles?

