The Epson Stylus Photo RX585 printer, like all Epson inkjet printers, is programmed with an internal maintenance counter that tracks ink absorption. When this counter reaches its limit, your printer will stop working and display an error message, such as “Service Required” or “Parts Life Over.” This is where an Epson RX585 resetter, often called a reset key or adjustment program, becomes a useful tool.
By using the Epson RX585 resetter, the printer will be able to be used again after being reset. Additionally, with this tool, you will be able to perform printer maintenance independently at home.
Below, we will provide you with a guide on how to use the Epson RX585 Resetter, along with a link where you can download this resetter.
Table of Contents
- Why Does the Epson RX585 Need to Be Reset?
- How Does the Epson RX585 Resetter Work?
- How to Use Epson RX585 Resetter
- Download Epson RX585 Resetter Here
Why Does the Epson RX585 Need to Be Reset?
During its normal operation, your Epson RX585 performs automatic cleaning cycles to prevent the printheads from clogging. The ink used in these cycles is not printed onto paper but is instead absorbed by a pad or sponge located inside the printer, known as the waste ink absorber.
The printer’s firmware has a preset limit for how much ink this pad can hold. Once the counter estimates that the pad is near capacity, it triggers a fatal error and locks the printer to prevent potential ink leakage that could damage internal components. In reality, the physical pad often has much more absorption capacity left. The resetter software allows you to clear this electronic counter, effectively telling the printer that the “maintenance” has been performed, and it can resume printing.
How Does the Epson RX585 Resetter Work?
The resetter software works by establishing a communication link between your computer and the printer. When you run the program, it sends specific commands to the printer’s memory, accessing a maintenance mode that is not available through the standard printer controls. From there, it can read the current value of the waste ink counter and, with a click, reset it back to zero.
How to Use Epson RX585 Resetter
1. Before you use the Epson RX585 Resetter, it is advisable to temporarily disable all antivirus programs. This is done to ensure that the reset process runs smoothly. Additionally, make sure that the printer is turned on and connected to the computer.
2. Download the Epson RX585 Resetter through the link provided at the bottom of this article.
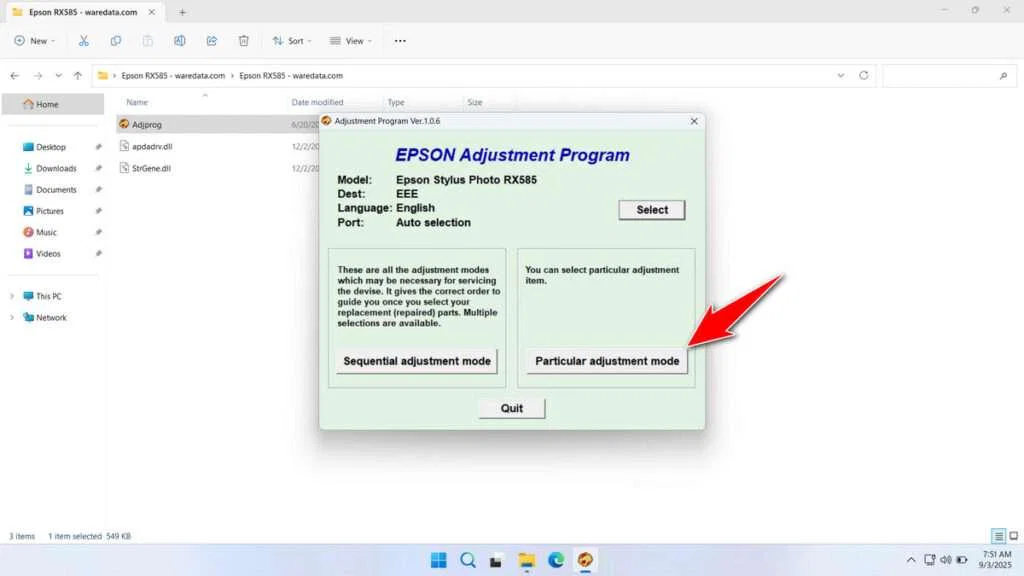
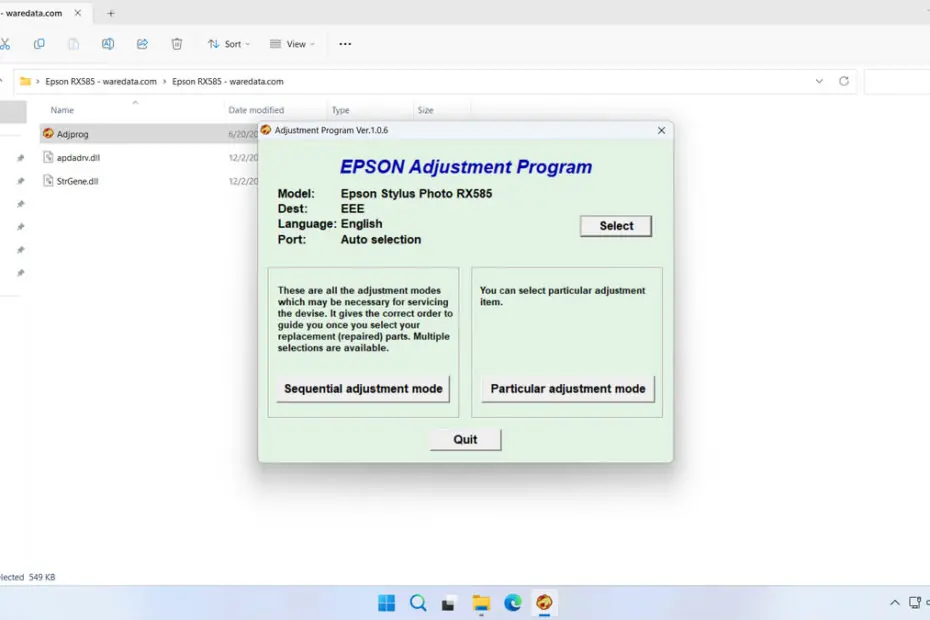
3. Extract the resetter file. After extracting, open the folder and run the Adjprog.exe file.
4. After the reset program runs, please click Accept, then proceed by clicking Particular adjustment mode.

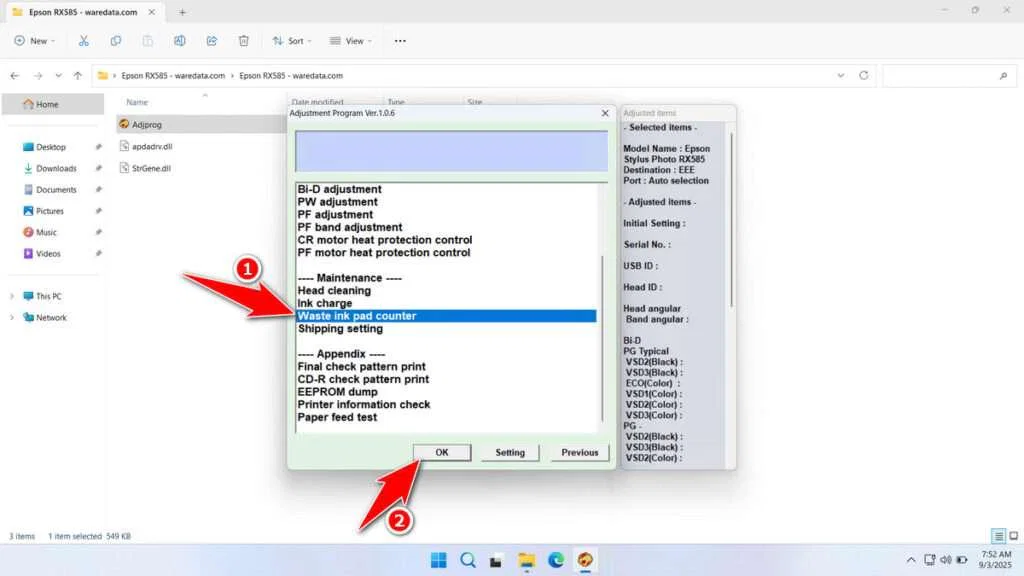
5. Select the Waste ink pad counter and then click OK.

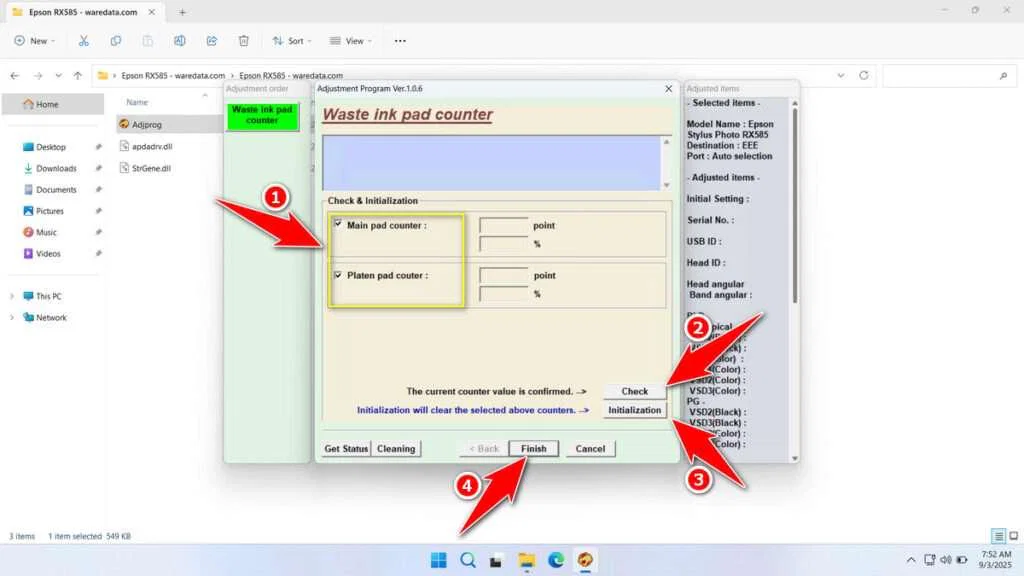
6. Tick the Main Pad Counter and Platen Pad Counter, then click Check, and then click Initialization.

7. After the printer is successfully reset, immediately turn off the printer, and you can turn it back on afterwards. However, if the reset process fails, you can try moving the printer’s USB cable to another available port on the computer, and then you can try repeating the reset process.
Download Epson RX585 Resetter Here
Repeatedly resetting the printer without replacing or cleaning the Waste Ink Pad inside it can potentially cause waste ink from the printer to leak out, which can dirty your workspace.
For those of you who already understand how the Epson RX585 Resetter works, you will certainly be able to use this software more carefully. You can download the Epson RX585 Resetter through the following link.
File Size: 0.57MB
File Type: .ZIP
OS Support: Windows 7/8/10/11 or higher
Maybe you would like other interesting articles?

