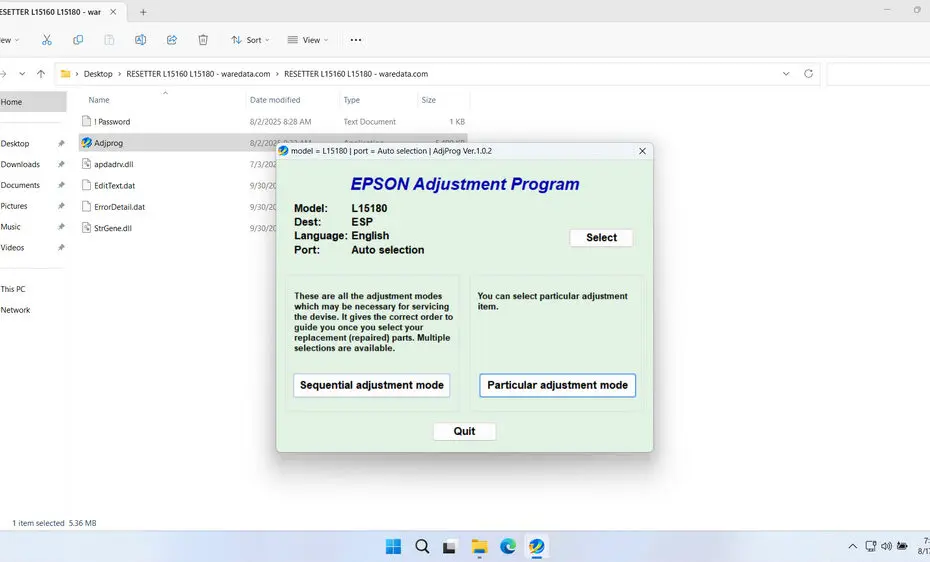
The Epson L15180 resetter, usually called the Adjustment Program, is a specialized software tool developed to reset various internal counters and settings within your printer. The main purpose of the reset is to reset the Waste Ink Pad Counter on the Epson L15180 printer. If this Waste Ink Pad Counter is full, it will render the Epson L15180 printer unusable. In urgent situations, the Epson L15180 Resetter can be relied upon.
Below, we will provide you with a guide on how to use the Epson L15180 and where you can download it.
Table of Contents
- When Does the Printer Need to Be Reset?
- How Does the Epson L15180 Resetter Work?
- How to Use Epson L15180 Resetter
- Download Epson L15180 Resetter Here
When Does the Printer Need to Be Reset?
The most common scenario requiring the resetter is encountering the “Service Required” or “Parts Inside Printer are Near End of Service Life” error message. This message indicates that the printer’s internal waste ink counter has reached its preset limit. Even if the physical waste ink pads might still have capacity (though often they are saturated by this point), the printer will stop functioning until this counter is reset.
How Does the Epson L15180 Resetter Work?
The resetter software works via a USB connection between your computer and the printer. It sends specific commands to the printer’s service mode:
- Initialization: The software identifies the connected printer model.
- Reading Counters: It can read the current values of various internal counters (like the waste ink counter).
- Performing Resets: You select the specific counter you need to reset.
- Writing Data: The software sends the command to reset the selected counter to zero or a predefined value.
- Exiting Service Mode: The printer reboots, with the error message cleared and functionality restored.
How to Use Epson L15180 Resetter
1. Before downloading and using the Epson L15180, first disable all antivirus software on your computer. This is done to ensure that the reset process runs smoothly. Additionally, make sure the printer is turned on and connected to the computer using a USB printer cable.
2. You can download the Epson L15180 Resetter through the link at the end of the article.
3. After you download your resetter file, please extract the file. Open the extracted folder and run the file named AdjProg.exe.
4. When you first run the file AdjProg.exe, you will need a password that you can find in the Password.txt file. Copy the password from there, then click OK. A pop-up will appear. Please click Accept.
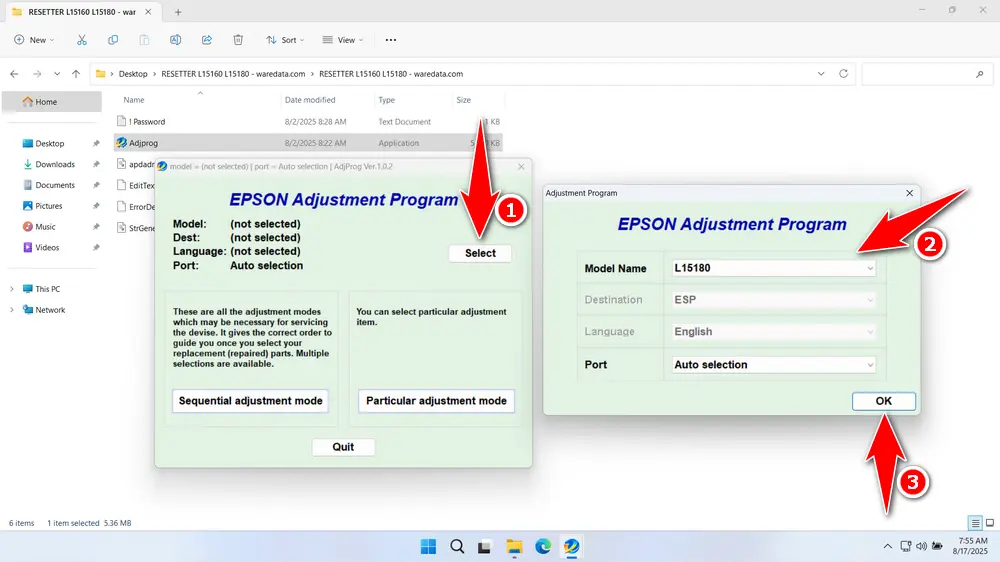
5. After the resetter has been successfully run, click the SELECT button. Choose the printer model L15180, then click OK.
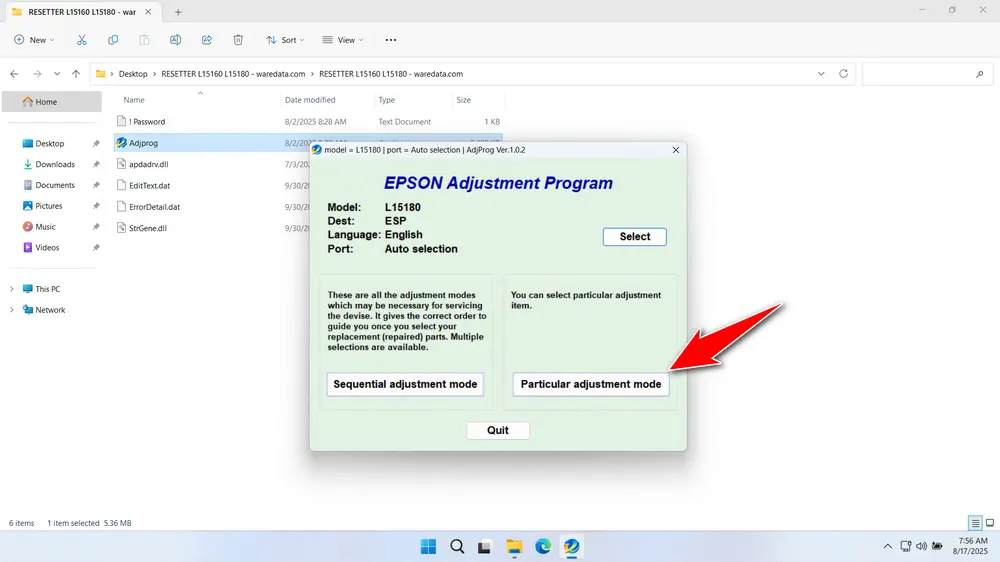
6. Click the Particular adjustment mode button.
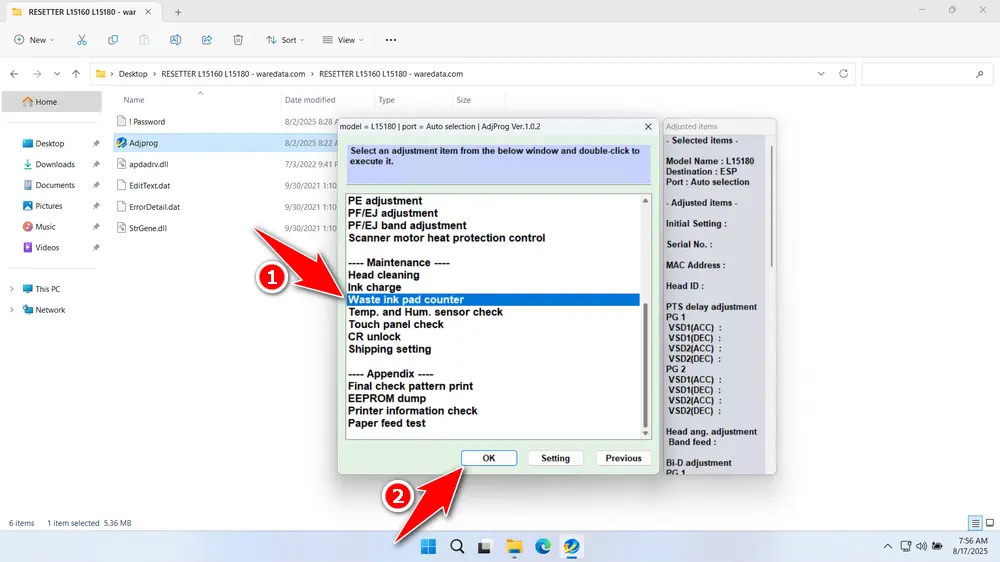
7. Continue by selecting the Waste ink pad counter, then click OK.
8. Tick the Platen Pad Counter option, then click the Check button, then click Initialize, and if successful, click Finish. Immediately turn off the printer, and then you can turn the printer back on afterwards.
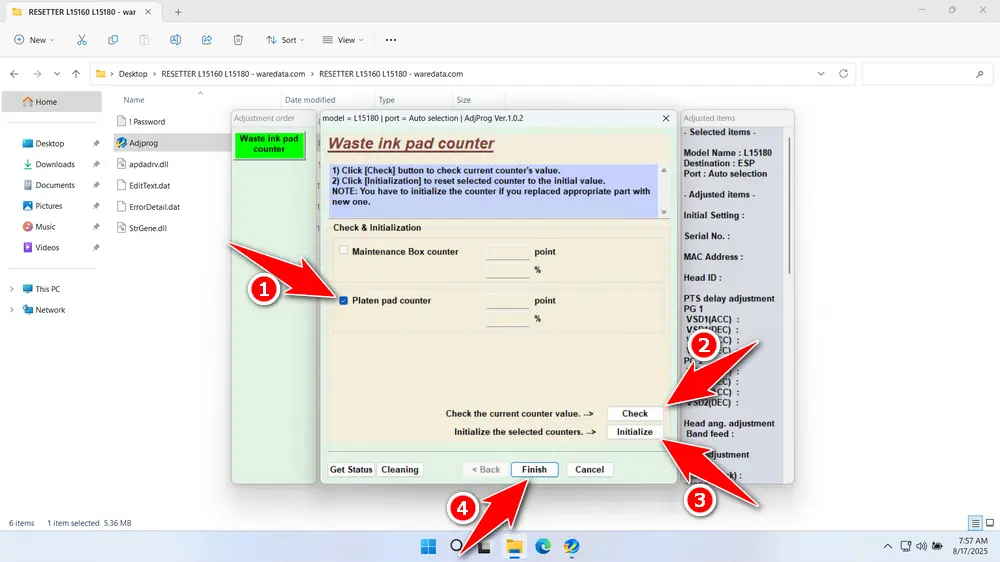
9. If the reset fails, please move the printer’s USB cable to another available port on your computer and then repeat the reset process.
Download Epson L15180 Resetter Here
Never reset the waste ink counter without first physically checking, cleaning, or replacing the saturated waste ink pads. Resetting without doing this risks severe ink leakage, damaging your printer, and potentially your workspace.
After you understand how to use the Epson L15180 Resetter, you should be able to use this resetter software with great caution. You can download the Epson L15180 Resetter through the following link.
File Size: 5MB
File Type: .ZIP
OS Support: Windows 7/8/10/11 or higher
Maybe you would like other interesting articles?

