
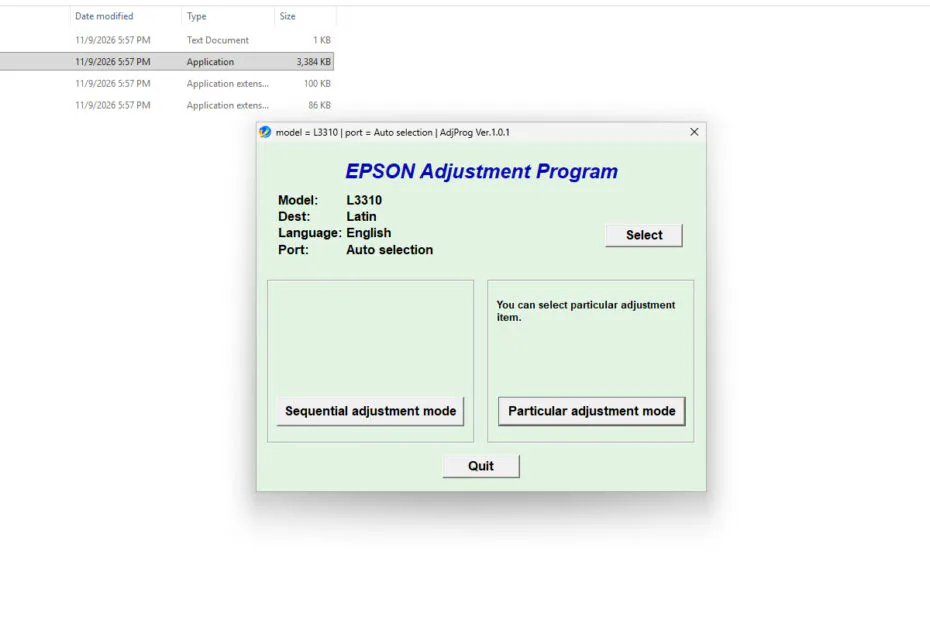
Epson L3310 Resetter is an adjustment program software used to reset the Waste Ink Pad counter on the Epson L3310 printer.
By using this resetter software, you can perform maintenance on the Epson L3310 printer independently. So when errors occur, such as “Service required”, “A printer’s ink pad is at the end of its service life”, and other errors, you can carry out repairs independently at home.
Below, we will share the resetter software for the Epson L3310 printer, along with a guide on how to use this resetter on Windows 11.
Table of Contents
- Benefits of Having an Epson L3310 Resetter
- How to Use Epson L3310 Resetter
- Epson L3310 Resetter Download
Benefits of Having an Epson L3310 Resetter
When you are in an emergency situation to print documents using the Epson L3310 printer, it turns out your printer requires maintenance, such as the Waste Ink Pad Counter issue which cannot be resolved independently and must be serviced at a service center. With this resetter software, you can perform repairs independently at home.
How to Use Epson L3310 Resetter
1. Before performing the printer reset process, you must ensure that the printer is turned on and connected to your Windows PC. Also, make sure to temporarily disable the antivirus during the download and reset process.
2. After that, you can download the Epson L3310 Resetter through the link below this article.
3. After downloading the resetter software, please extract the resetter file by right-clicking on the file, then select Extract All.
4. Open the extracted resetter folder and run the AdjProg.exe file by double-clicking it.
5. If the Windows Defender smart screen appears, you just click More Info > Run anyway.
6. When you run the resetter for the first time, you need the password stored in the _Password.txt file; you can see the password there.
7. After the resetter software is successfully opened, please click the SELECT button.
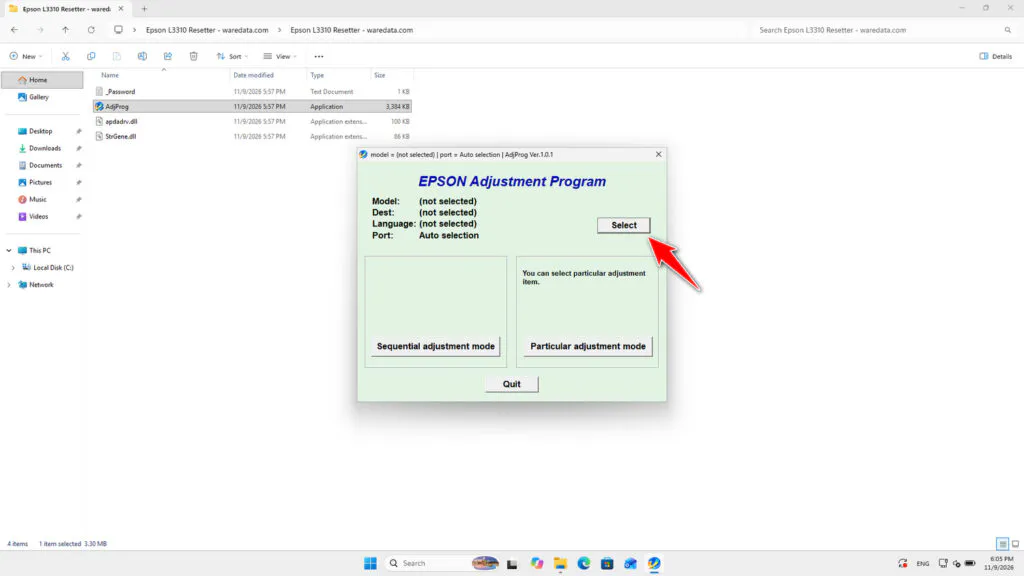
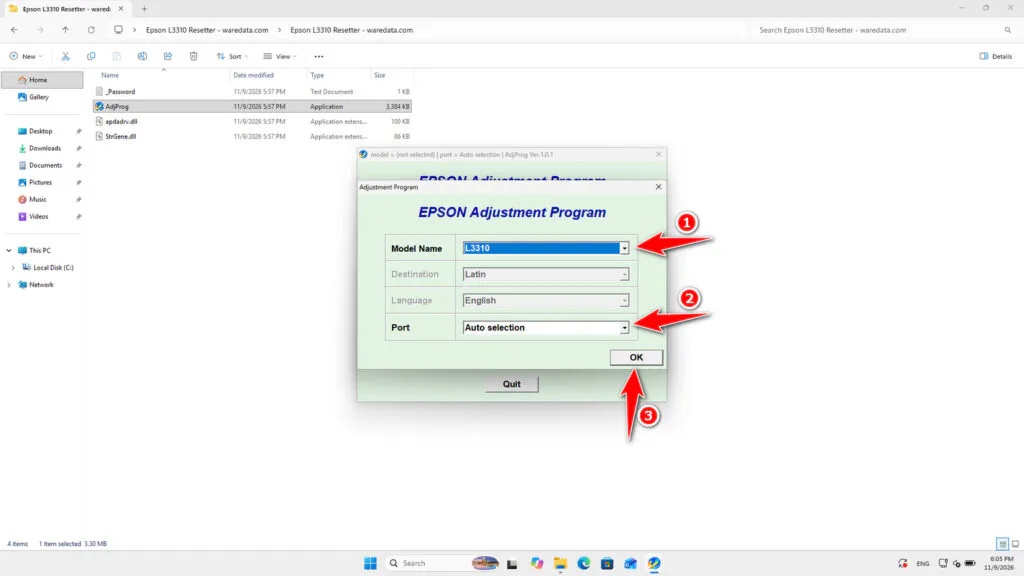
8. Select the printer model and its port. You can use the automatic port or a manual port that detects the presence of the printer, then click OK.
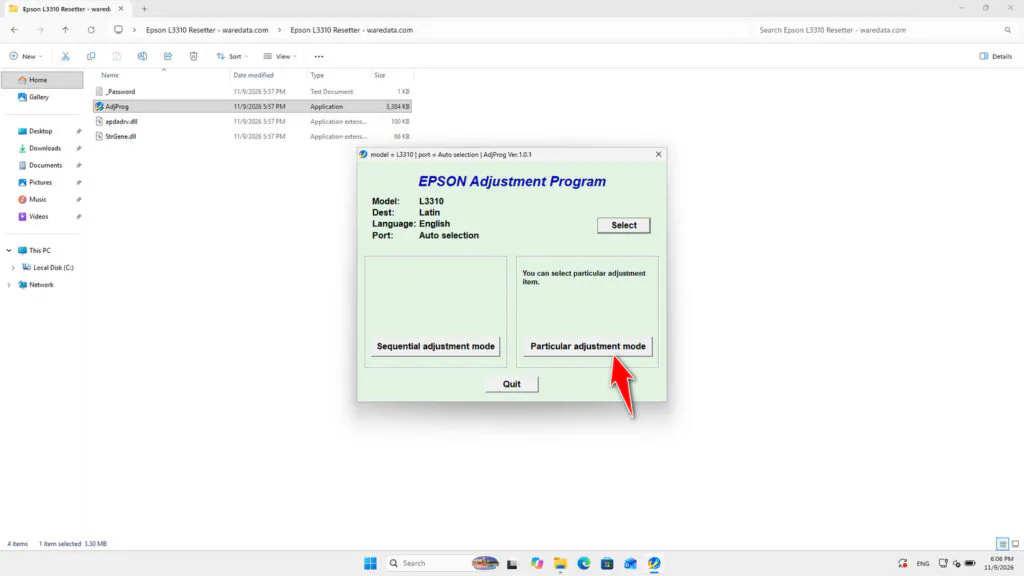
9. Then click the Particular adjustment mode button.
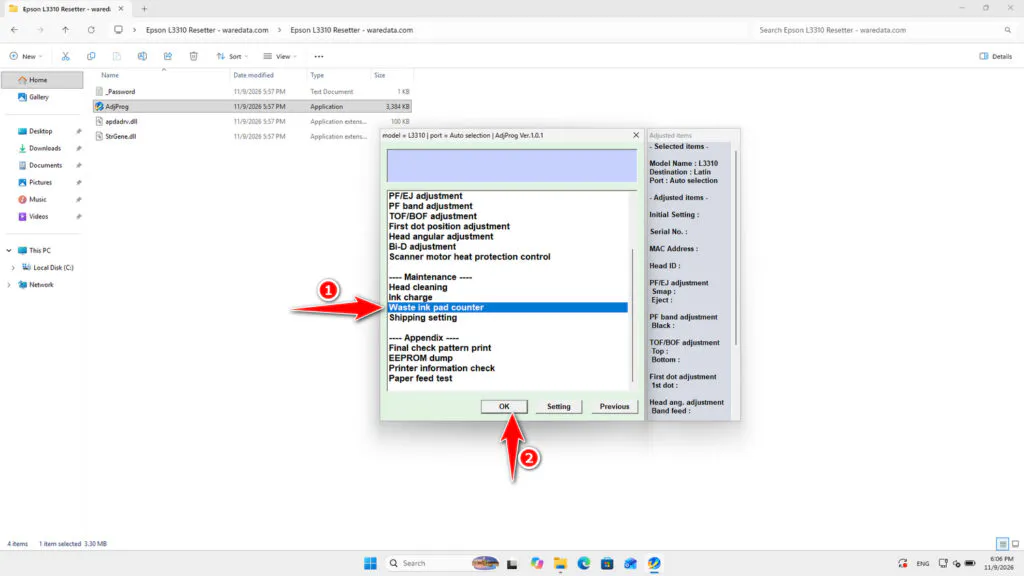
10. Select Waste ink pad counter, then click OK.
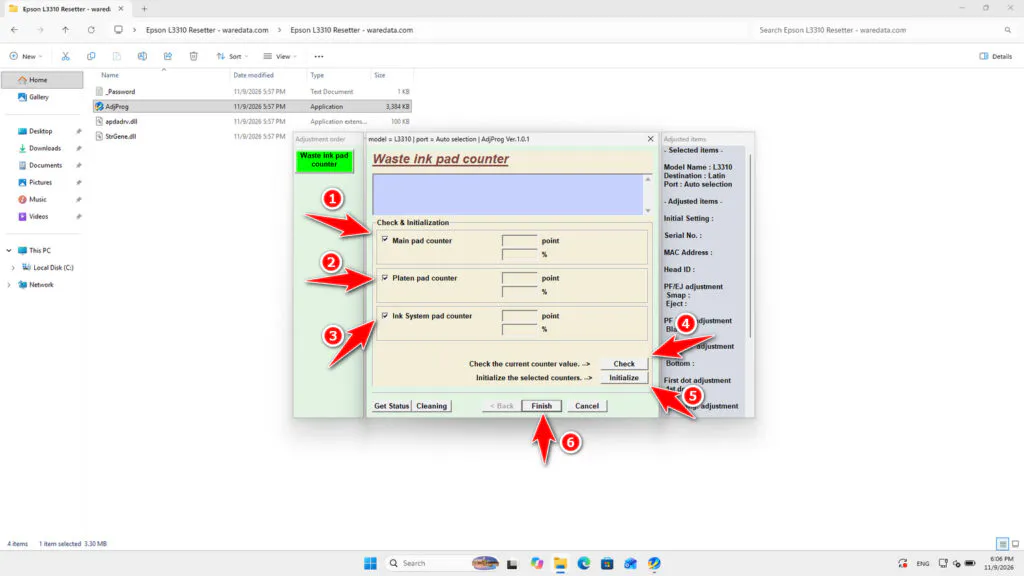
11. Check the Main pad counter, Platen pad counter, and Ink System pad counter options. Then click the Check button; after that, click the Initialize button. After the reset is successful, immediately turn off the printer, and then you can turn the printer back on. Finally, you can click Finish and close the resetter software.
12. If the reset process fails, try moving the printer’s USB cable to another available port on your Windows PC. Then don’t forget to temporarily disable the antivirus. After that, you can perform the reset process again.
Epson L3310 Resetter Download
If you have an Epson L3310 printer and need resetter software for this type of printer, you can download the resetter software through the following link. But remember, this resetter software can only run on the Windows operating system.
File Size: 3.35
File Type: .ZIP
OS Support: Windows
Maybe you would like other interesting articles?