The Epson RX685 Resetter is an adjustment software program used for maintenance on the Epson RX685 printer. The most frequently performed maintenance using this resetter is digitally cleaning the waste ink pad counter.
As we know, almost all Epson printers have a mechanism to prevent waste ink from leaking out of the printer by counting a certain amount of waste ink through the Waste Ink Pad counter. If the waste ink pad counter is full, then the printer cannot be used and requests the waste ink pad to be replaced or cleaned, while the counter also needs to be reset.
Below, we will provide you with a guide on how to use the Epson RX685 Printer and also where you can download it.
Table of Contents
Why is a Resetter Needed?
Inside your Epson RX685 printer, there is a designated absorbent pad, often called a “maintenance box” or “ink absorber.” This pad soaks up a small amount of excess ink during essential operations like:
- Print Head Cleaning: The printer uses ink to flush the print heads to prevent clogs.
- Initial Setup: When you first set up the printer or change ink tanks, ink is pumped to prime the system.
Over time, this pad reaches its saturation limit. The printer’s internal counter meticulously tracks this usage. Once the predetermined limit is reached, the printer will automatically stop working and display an error message such as “Service Required,” “Parts Life End,” or “A printer’s ink pad is at the end of its service life.”
This is a safety feature by Epson to prevent ink from overflowing and damaging your printer’s internals or your workspace. The official Epson recommendation is to take the printer to an authorized service center for maintenance, which can be costly and time-consuming. The resetter software allows users to reset this counter themselves, effectively telling the printer that the waste ink pad has been “replaced,” so printing can resume.
How to Use Epson RX685 Resetter
1. Before you use the Epson RX685 Resetter, it is advisable to temporarily disable your antivirus. This is done to ensure that the reset process goes smoothly. Additionally, make sure the printer is connected to the computer that will be used for the reset.
2. You can download the Epson RX685 Resetter through the link provided below this article.
3. Extract the Resetter file that has been downloaded by right-clicking on the file and then selecting Extract All.
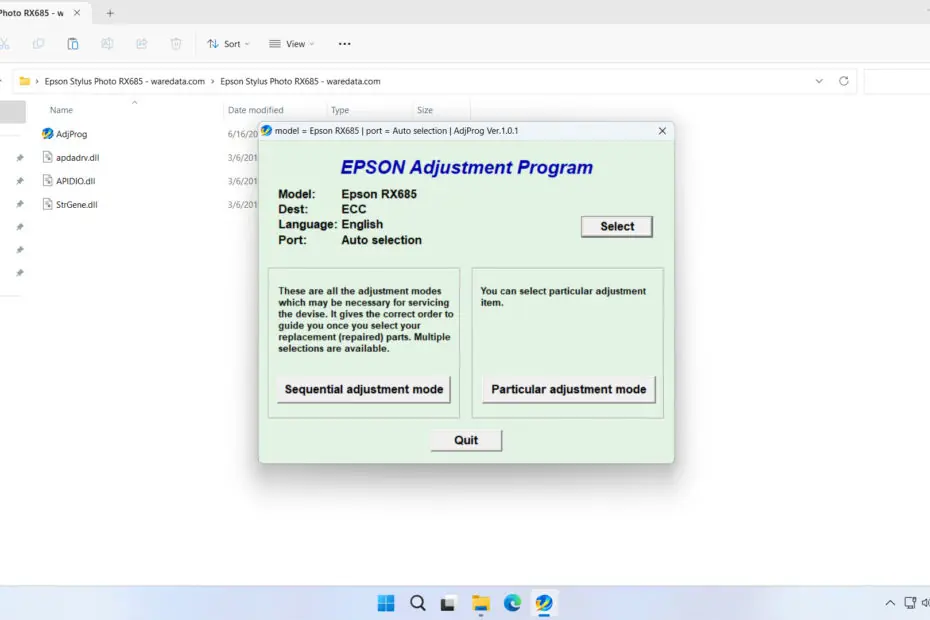
4. Open the extracted folder, then run the file AdjProg.exe. After that, click Accept.
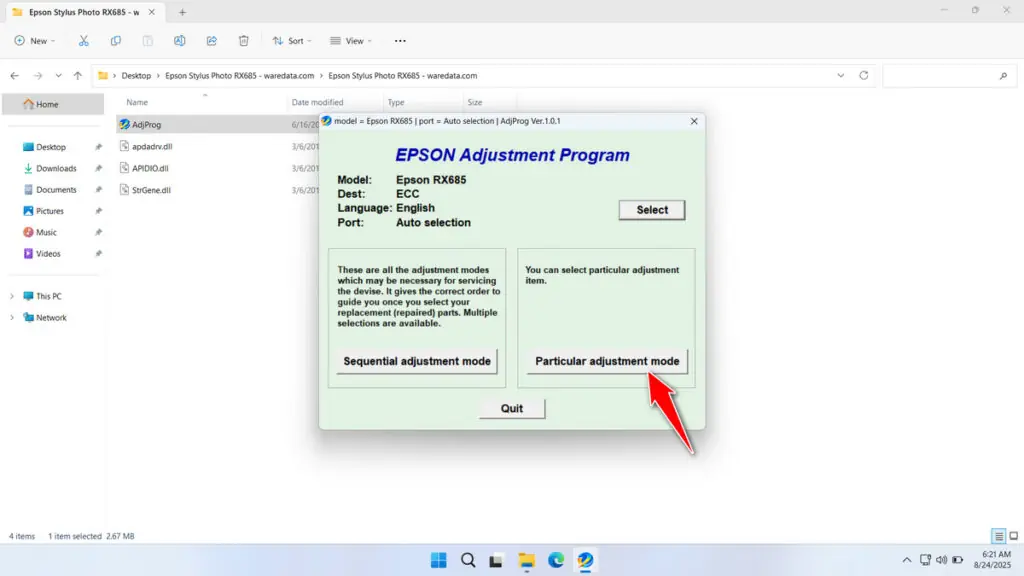
5. Continue by clicking the Particular adjustment mode button.

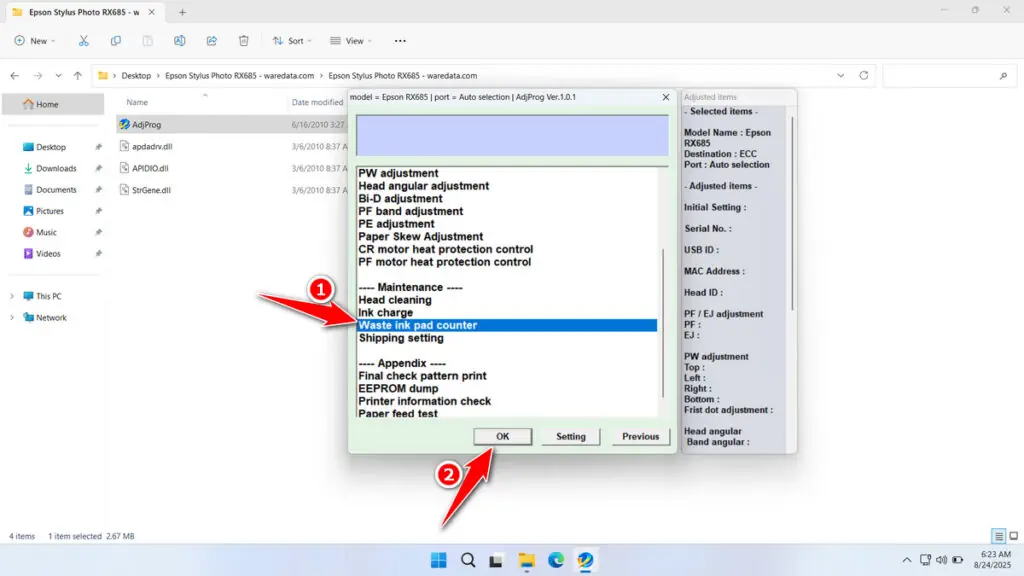
6. Select the Waste ink pad counter and then click OK.

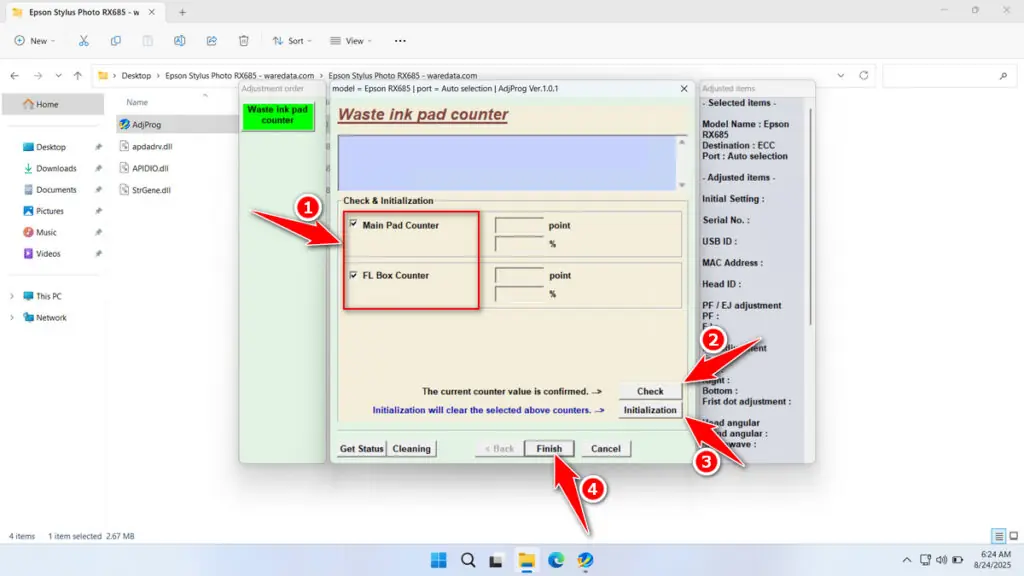
7. Tick the Main Pad Counter and FL Box Counter. After that, click the Check button, then click Initialization, and finally click Finish after the reset is successful. Immediately turn off the printer after it has been successfully reset, and then you can turn the printer back on afterwards.

8. If the reset process fails, try moving the printer’s USB cable to another available port on your computer. Then, repeat the reset process.
Download Epson RX685 Resetter Here
It is important to note that using a resetter to reset the Waste Ink Pad Counter without physically replacing/cleaning the Waste Ink Pad may potentially cause waste ink from your printer to leak out, thereby dirtying your workspace.
After you understand how the resetter works well and the risks it may pose, we believe you can use the resetter software responsibly.
For those of you who need the Epson RX685 Resetter, you can download it through the following link.
File Size: 0.9MB
File Type: .ZIP
OS Support: Windows 7/8/10/11 or higher
Maybe you would like other interesting articles?

