The Dell Printer E310DW Driver is a software package that must be installed, especially for Windows operating system users, so that the Dell E310DW printer can operate optimally and be compatible with various applications available on Windows.
If you use the Dell E310DW printer without installing the driver, it is likely that various applications on Windows will not be able to recognize this printer. Therefore, installing the driver is absolutely essential.
Below, we will provide a download link for the Dell E310DW Printer Driver as well as guide you on how to install this driver package on the Windows operating system.
Table of Contents
- Why is Driver Software Important?
- System Requirements
- How to Install Dell Printer E310DW Driver
- Download Dell Printer E310DW Driver Here
Why is Driver Software Important?
Without the correct driver installed, your computer can’t properly communicate with the printer, resulting in failed print jobs or the inability to access the printer’s full range of features. When you use applications like Microsoft Word, Excel, Acrobat, and Chrome, you will not be able to use them to print documents through these applications.
The Dell E310dw driver package includes not only the basic printing functionality but also access to advanced features such as duplex printing, toner level monitoring, print quality adjustments, and network configuration options. Ensuring you have the correct and most current version of the driver installed will guarantee that your printer operates at peak efficiency and that you can take advantage of all available features.
System Requirements
The Dell Printer E310DW Driver for Windows supports both 32-bit and 64-bit types, so it will be compatible with most Windows versions for installing this driver. Here are some of them.
Windows OS Supported
- Windows 11
- Windows 10 (32-bit & 64-bit)
- Windows 8 (32-bit & 64-bit)
- Windows 7 (32-bit & 64-bit)
- Windows Server
How to Install Dell Printer E310DW Driver
1. Before installing the driver, it is important to ensure that the printer is powered on and connected to the computer that will be used to install the driver software.
2. Download the Dell E310DW Printer Driver through the link below this article.
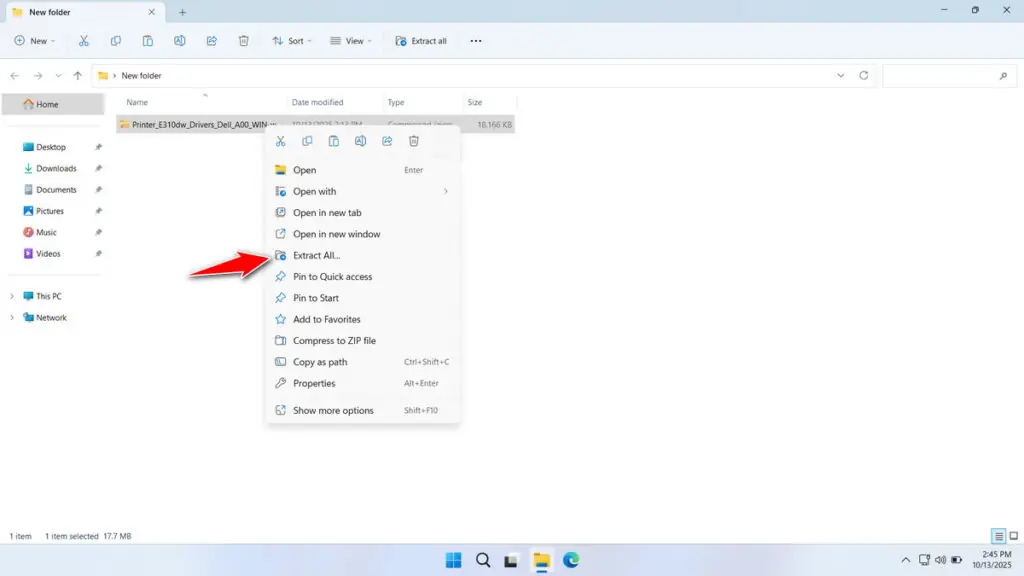
3. After downloading the driver file, extract the file by right-clicking and selecting Extract All.
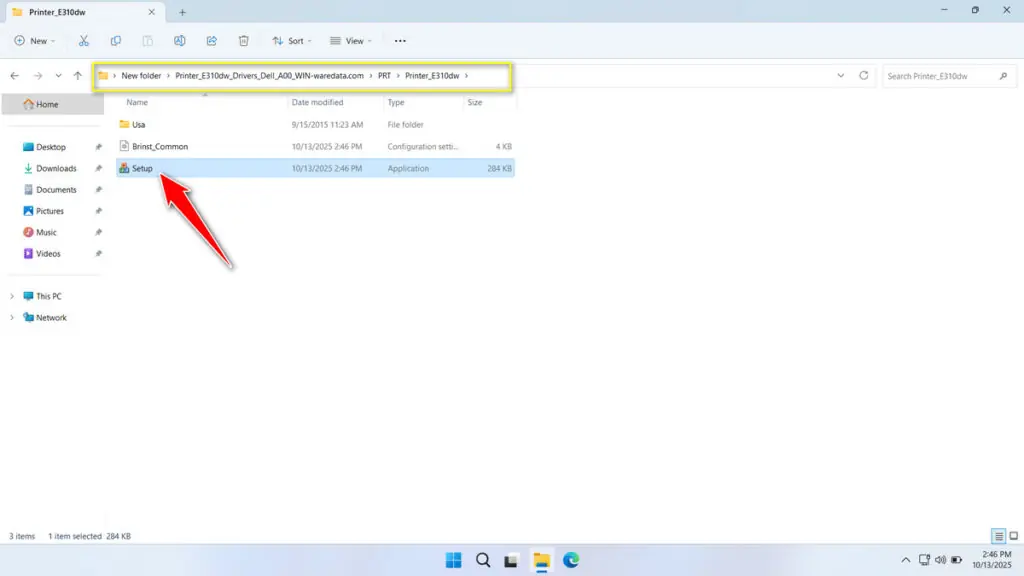
4. Open the extracted folder and double-click the Setup.exe file.
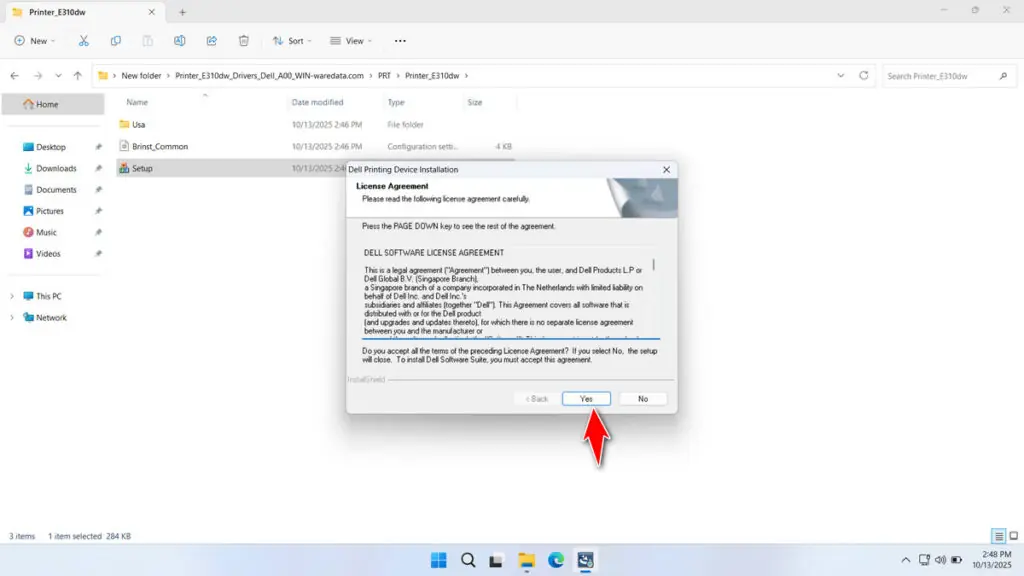
5. Click Yes button to agree to the license agreement.
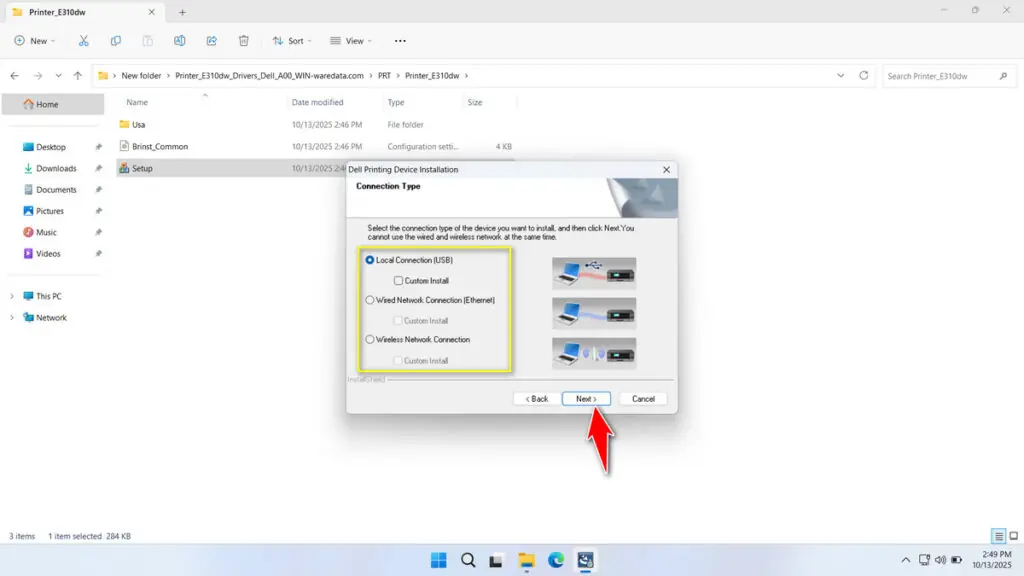
6. Select the printer connection to your computer, then click Next.
7. The driver installation process is underway. Please wait until it is complete.
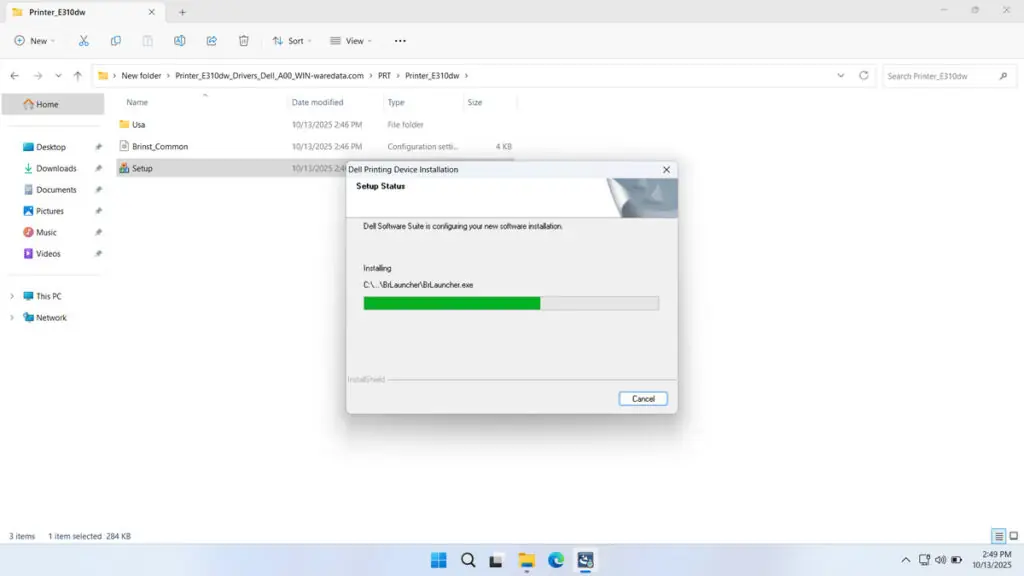
8. After completing the driver installation, for the best results, you can restart your computer first.
Download Dell Printer E310DW Driver Here
The Dell E310DW Printer Driver that we are sharing is obtained directly from Dell’s official website, so the driver software is very safe for you to install and use on your Windows operating system.
For those of you who need the Dell E310DW Printer Driver, you can download it through the following link.
File Size: 17.7MB
File Type: .ZIP
OS Support: See details here
Maybe you would like other interesting articles?

