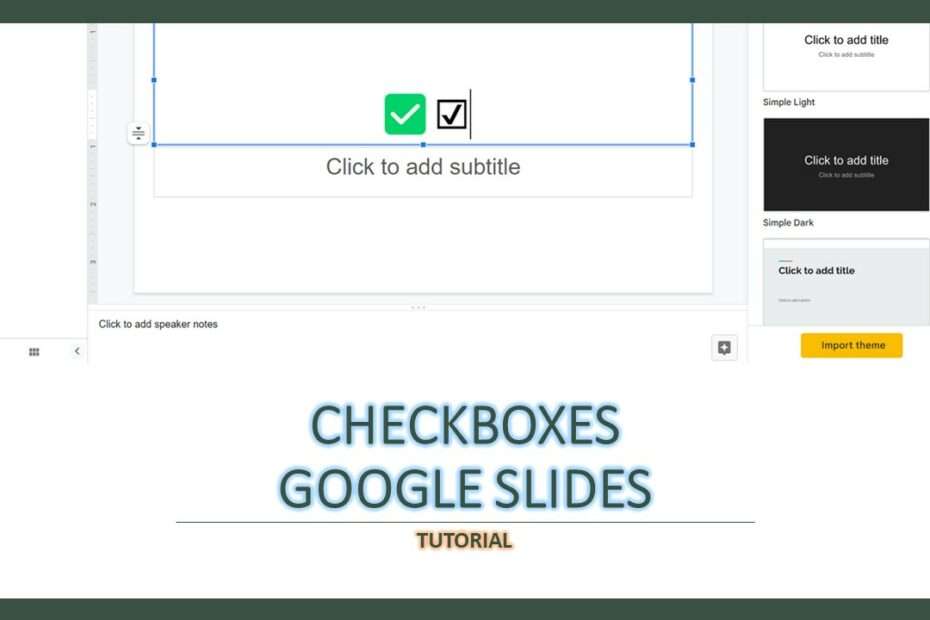
Creating checkboxes in Google Slides is very useful when we want to create several answer options that we will show and there is one correct answer option. If you’re using Google Docs, this might be common, but how about using Google Slides to display checkboxes?
Checkboxes in presentations are often needed, especially to list several items that will be presented. In Google Slides itself there are two popular ways to display Checkboxes, you can follow the following guide to create Checkboxes in Google Slides.
How to Create a CheckBox in Google Slides
First Method
Step 1. Open your Google Slides.
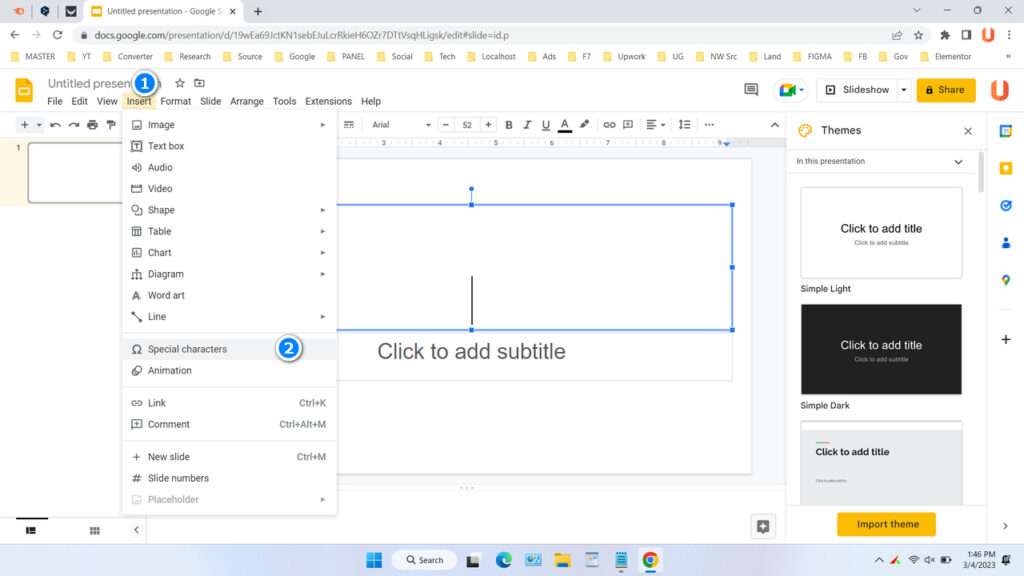
Step 2. Click Insert > Special characters.
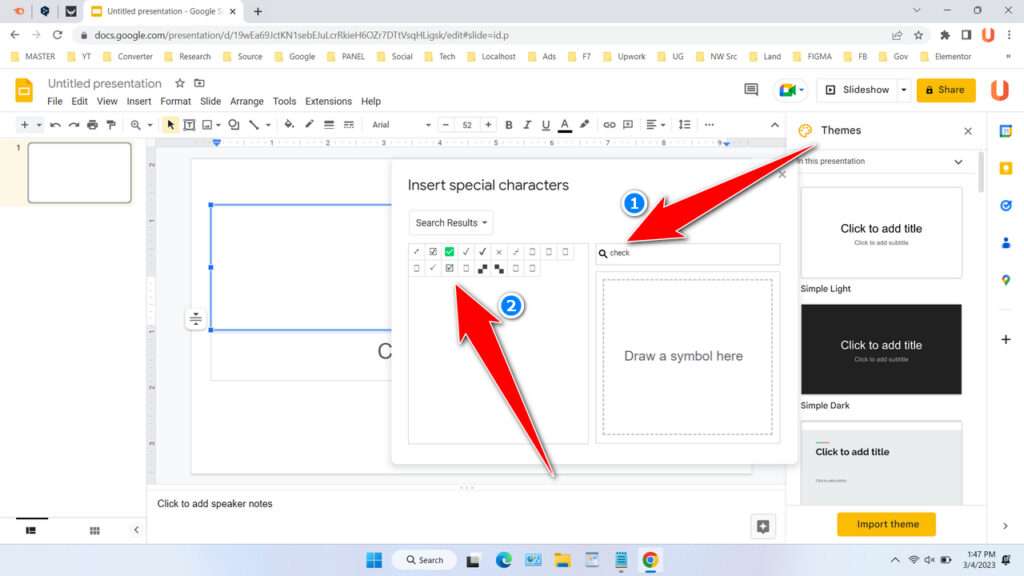
Step 3. Type “check” in the search field. Here you can choose various Checkbox styles that you want to use.
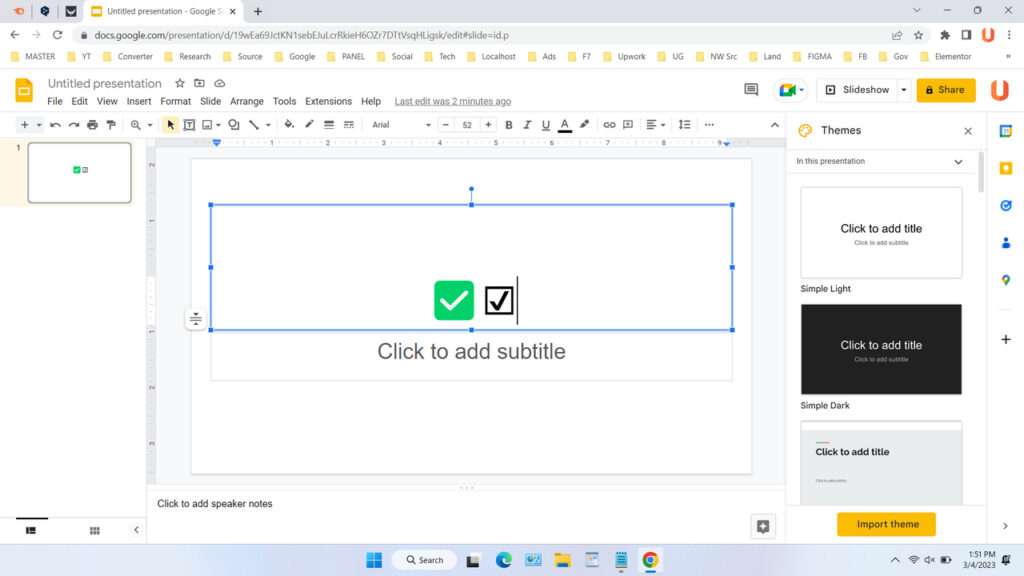
Step 4. The example result is as follows.
Second Method
In this second method, you can also create checkboxes in Google Slides instantly.
Step 1. Choose the Format options menu and select the display box as shown below.
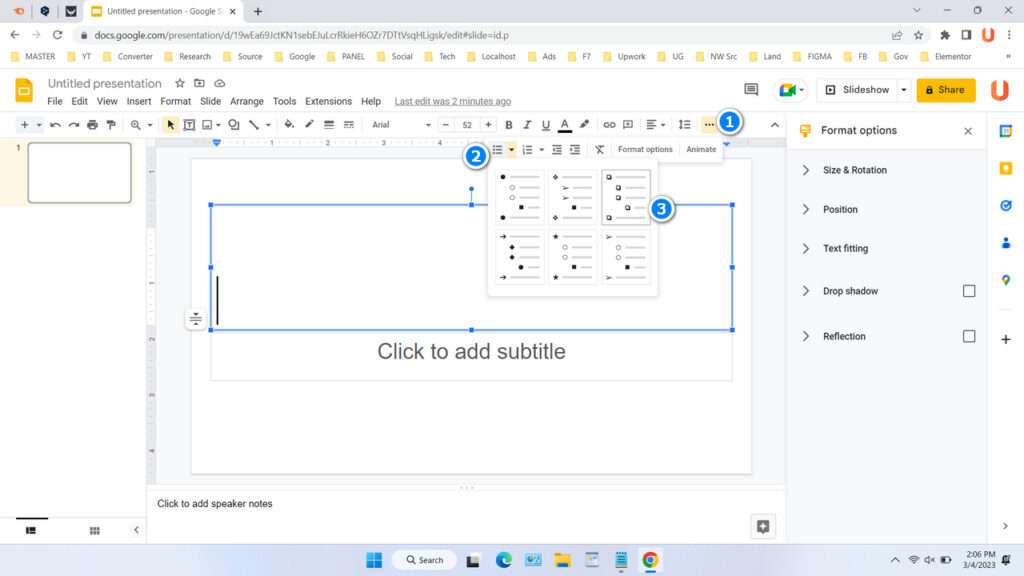
Step 2. You can right-click on the checkbox and then select the check symbol you want. You can also select other symbols this way.
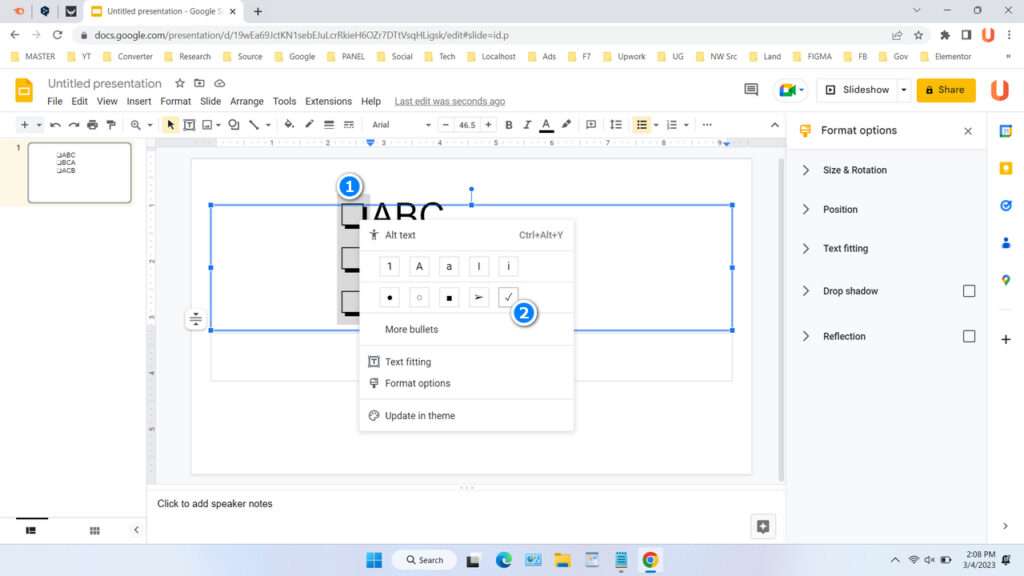
That’s a complete guide on how you can create a Checkbox in Google Slides. With the two methods we provide you can use the method you prefer.
Maybe you’re interested too?

