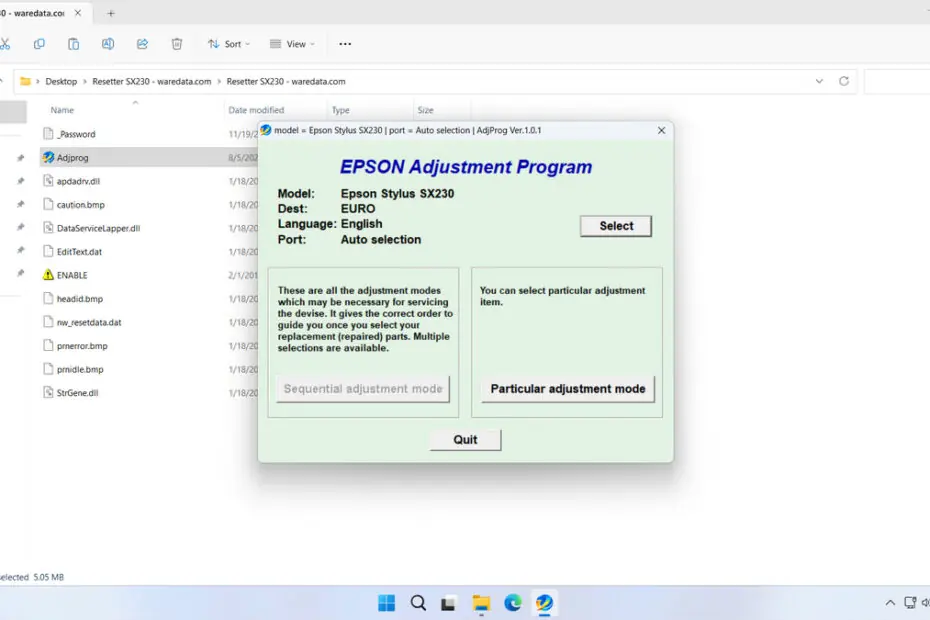
Is your Epson Stylus SX230 printer displaying a “Service Required”, “Ink Pad Full” error, or blinking red lights? This issue often signifies that the printer’s internal waste ink pad counter has reached its maximum capacity. Rather than replacing the entire printer or paying for expensive professional service, a reset utility can often resolve the problem quickly.
The Epson SX230 Resetter itself is software that can be used to clean the Waste Ink Pad counter on two types of printers, the Epson SX230 and Epson SX235W. By performing the reset yourself and replacing parts at home, you will gain more flexibility in time and have the potential to save on your expenses for repairing this printer.
Below, we will provide you with a guide on how to use a resetter for the Epson SX230 and SX235W printers, along with tips to ensure your printer is free from the full Waste Ink Pad Counter issue.
Table of Contents
What is a Waste Ink Pad Counter?
During normal operation, your Epson printer performs periodic cleaning cycles to maintain printhead health and prevent clogs. The ink extracted during these cycles isn’t used for printing and is diverted into a series of absorbent pads, known as waste ink pads, located inside the printer. To prevent ink from leaking and causing internal damage, the printer’s firmware meticulously tracks how much ink these pads have absorbed using an internal software tracker often called the “waste ink pad counter”. Once this counter reaches a predetermined threshold set by Epson, the printer will proactively stop working and display error messages. Epson SX230 Resetter is used to resolve issues because of this.
How to Use Epson SX230 Resetter
1. The way to use the resetter for the Epson SX230 is slightly different from other resetters, so you need to be careful in following the guide. However, before that, as usual, you need to temporarily disable the antivirus on your computer to prevent detection errors from the antivirus; in addition, make sure the printer is connected to the computer that will be used to perform the reset.
2. You can download the Epson SX230 Resetter through the link below this article.
3. After the resetter file is downloaded, please extract the file by right-clicking on the file and then selecting Extract All.
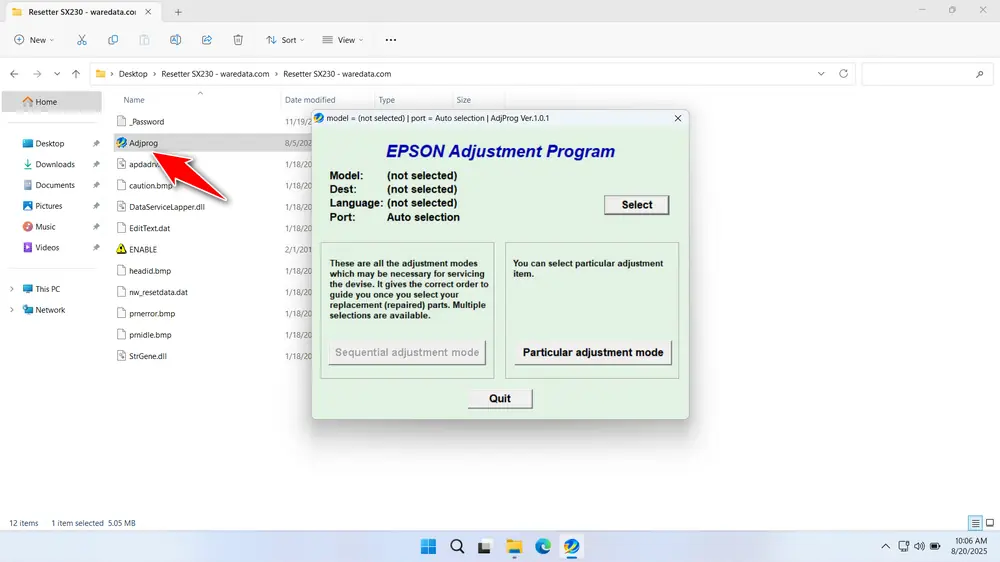
4. Open the resetter folder and run the AdjProg.exe file. The first time you open it, you will need the password found in the _Password.txt file.
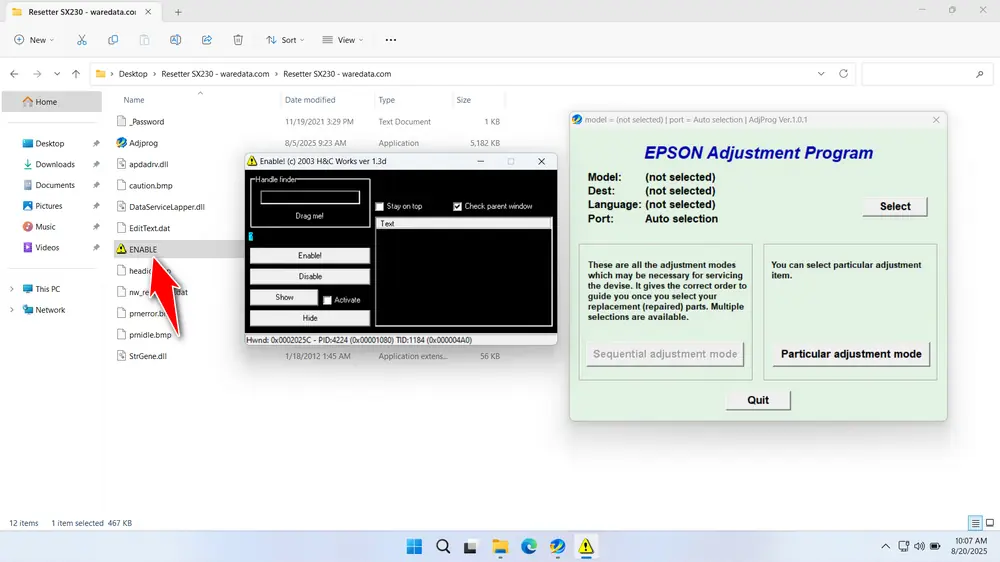
5. Also run the ENABLE.exe file by double-clicking it.
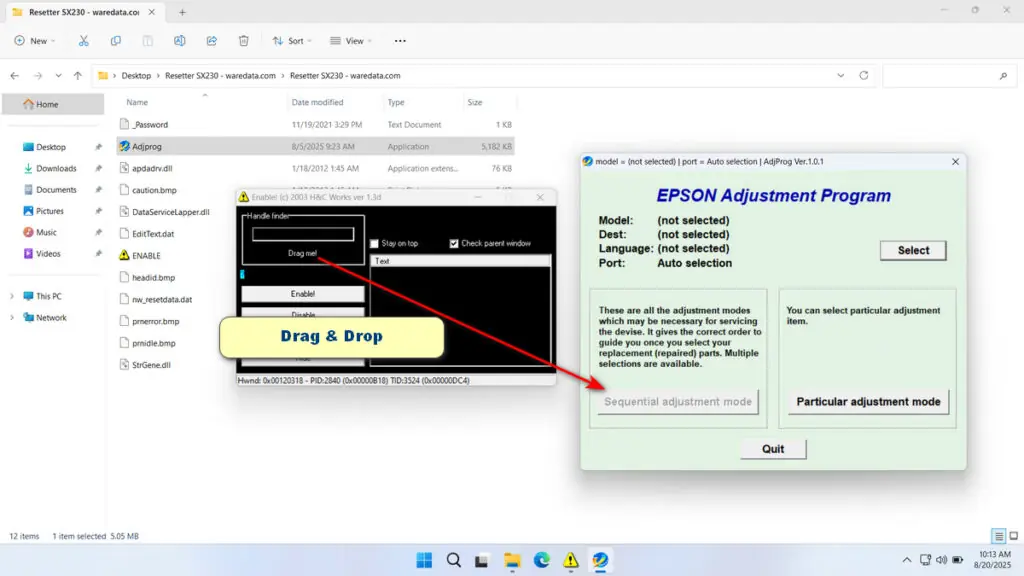
6. Drag and drop the text ‘Drag me!‘ in the ENABLE.exe application to the Sequential adjustment mode button in the AdjProg.exe application that has already been opened. See the following screenshot.
7. In the ENABLE.exe application, the text ‘Sequential adjustment mode‘ will appear. Click on this text, then click the Enable! button.
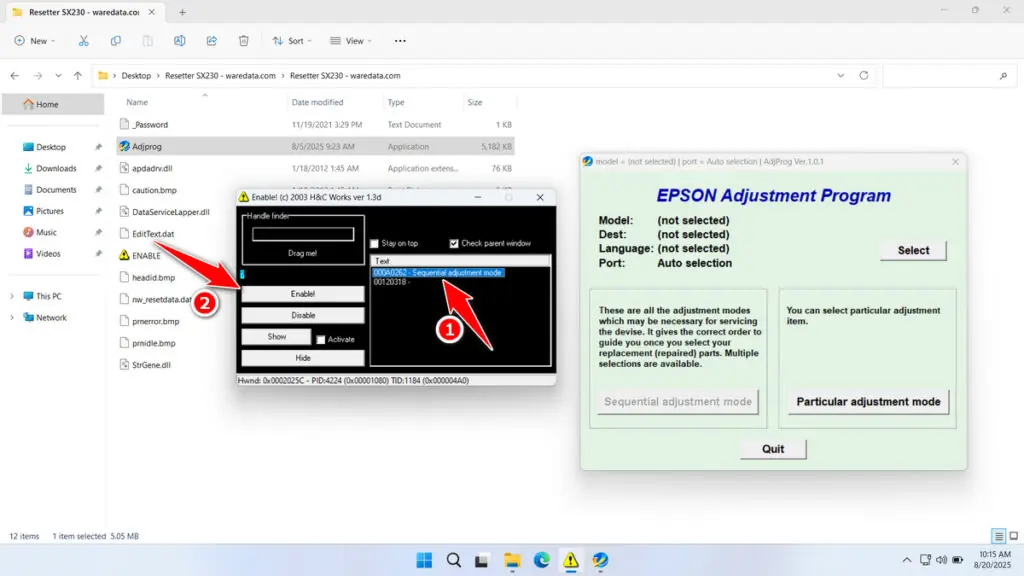
8. Click the ‘Sequential adjustment mode‘ button in the AdjProg.exe that is active.
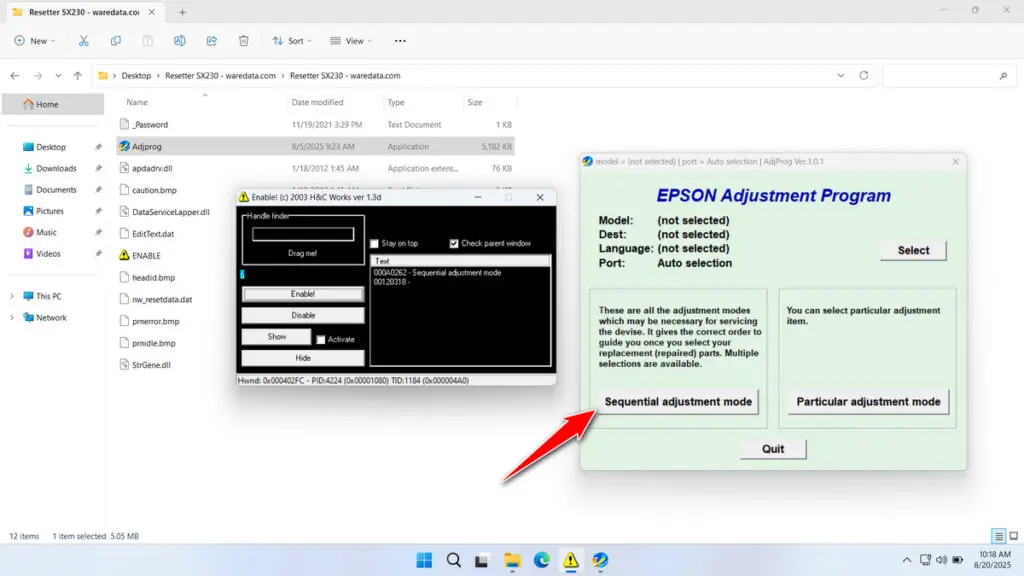
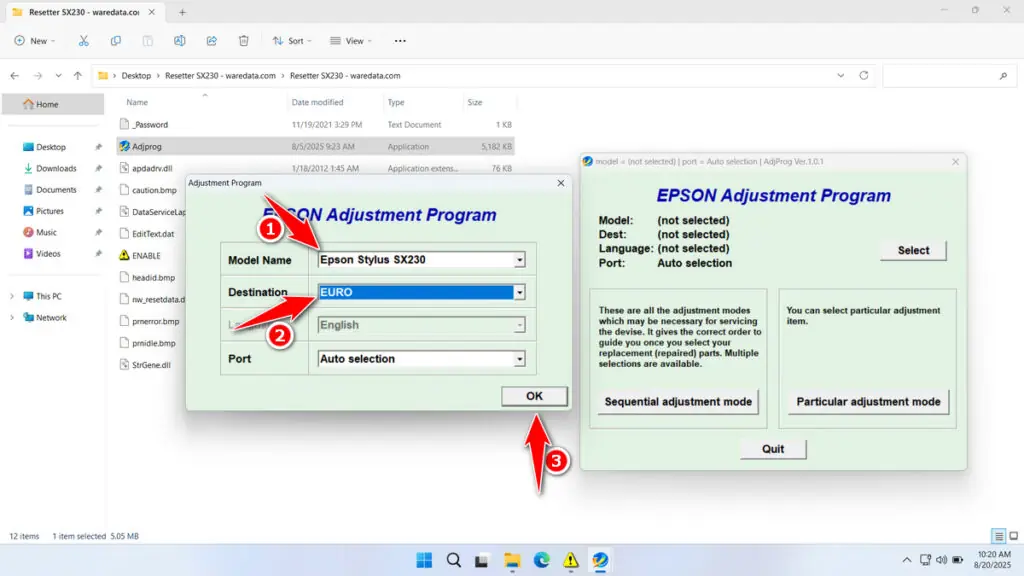
9. Select the printer Model Name, then the Destination, and then click OK.
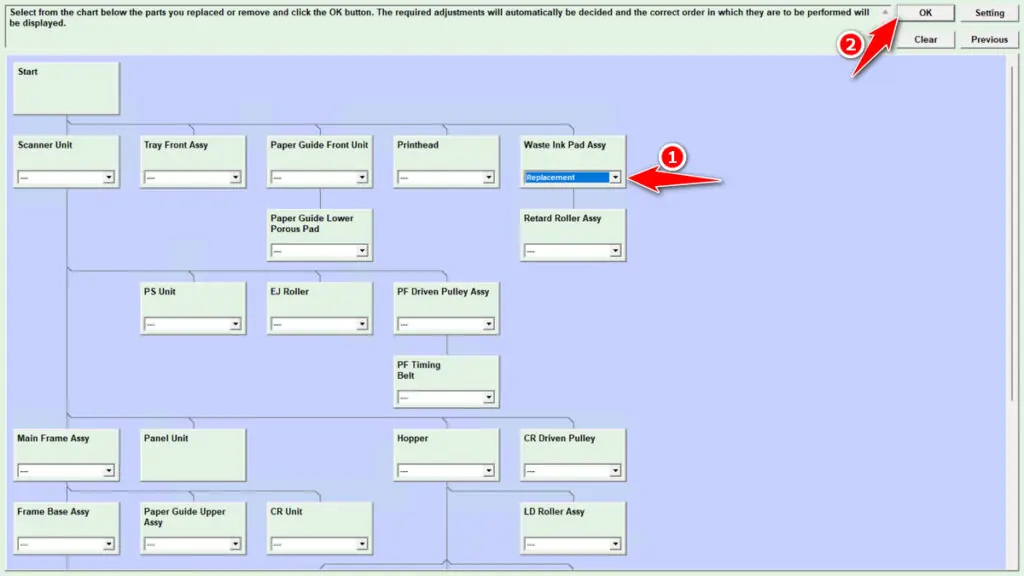
10. In the Waste Ink Pad Assy, select Replacement, then click OK.
11. Tick the Main Pad Counter and Platen Pad Counter option. Then click the Check button and click Initialization. After the reset is successful, immediately turn off the printer, and you can turn the printer back on afterwards.
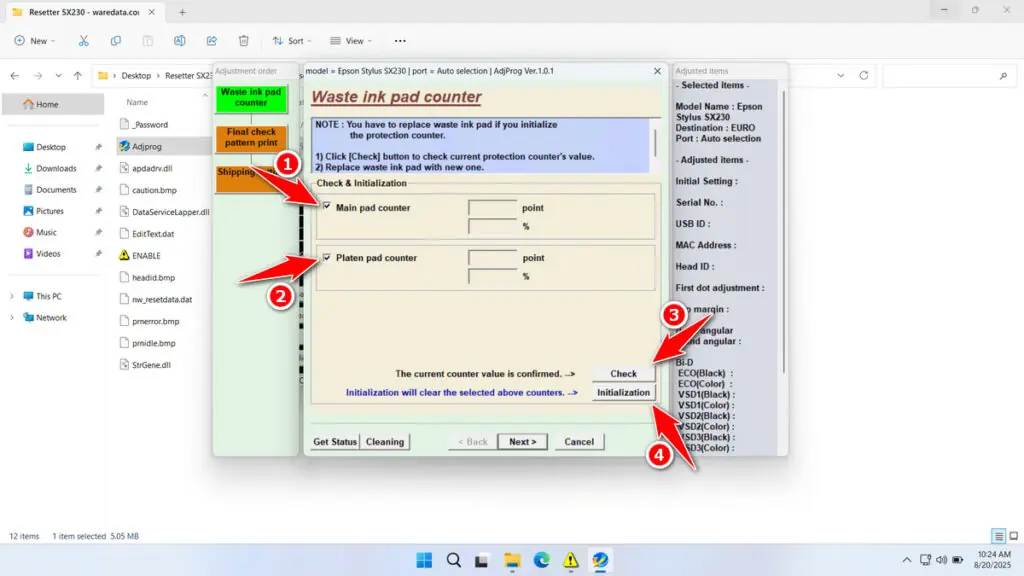
12. If the reset fails, try moving the printer’s USB cable to another available port on your computer, then repeat the process.
Download Epson SX230 Resetter Here
The reset process does not remove the accumulated ink. For the printer’s long-term health, physically removing, cleaning, or replacing the waste ink pads is highly recommended after a reset. This is to prevent printer ink from leaking and staining your work desk.
For those of you who need the Epson SX230 Resetter, which can also be used for the Epson SX235W, you can download it through the following link.
File Size: 4.04MB
File Type: .ZIP
OS Support: Windows 7/8/10/11 or higher
Maybe you would like other interesting articles?

