

For certain reasons, we don’t want to use the PIN feature in Windows 11, so we want to remove the PIN that we often forget. If you experience the same thing, in this article we will provide a guide on how to remove a PIN in Windows 11.
Before we discuss the guide, we need to remind you that after your PIN is removed, you will log in to Windows 11 using your Microsoft account. If what you want is not to require a PIN or password, the steps will be slightly different, and we will also provide you with the guide in video format.
Steps to Remove PIN from Windows 11
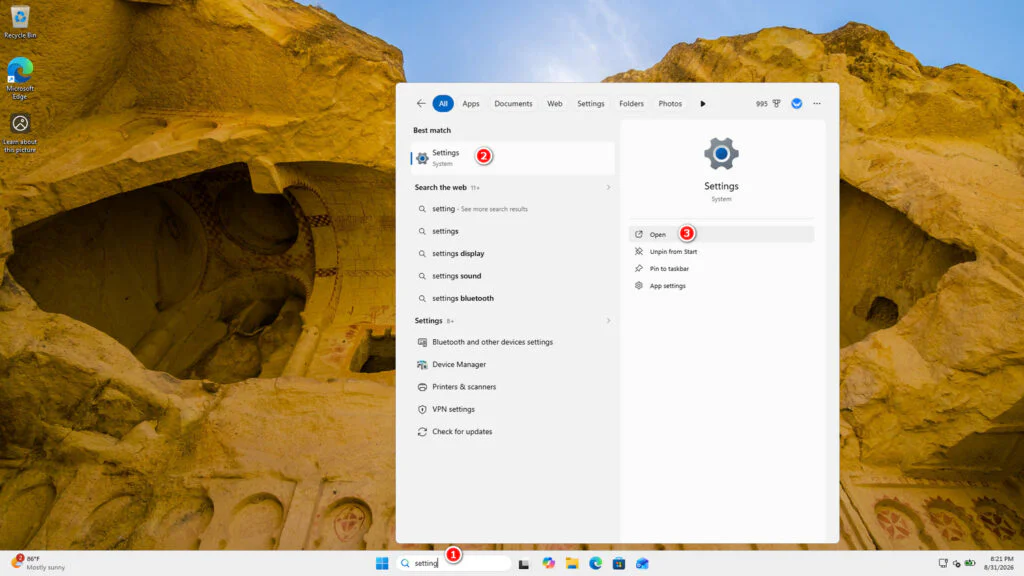
1. Go to Settings on your Windows 11. Just search for Settings in the Windows 11 search box and then click Open.
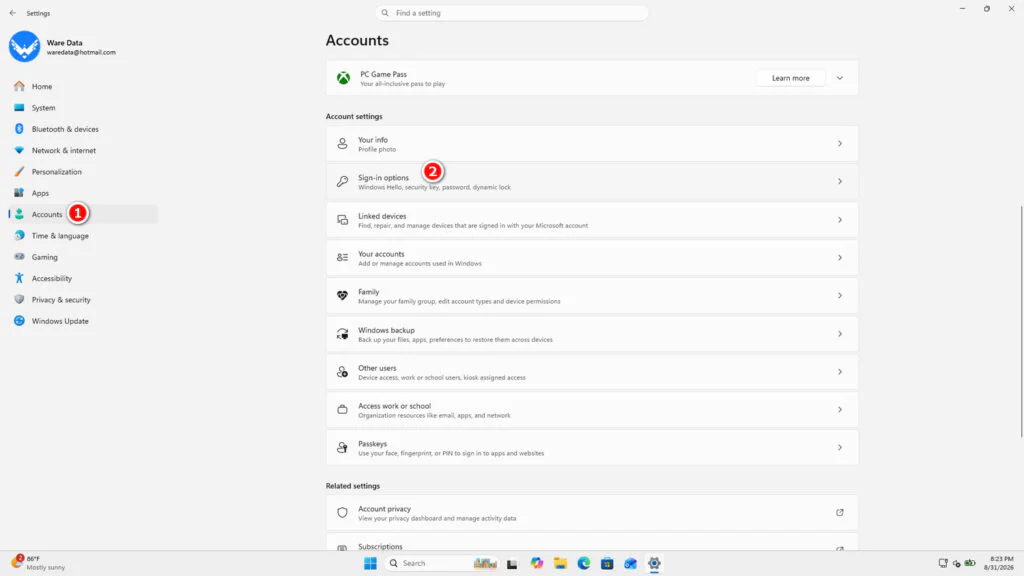
2. Select the Accounts menu, then Sign-in options.
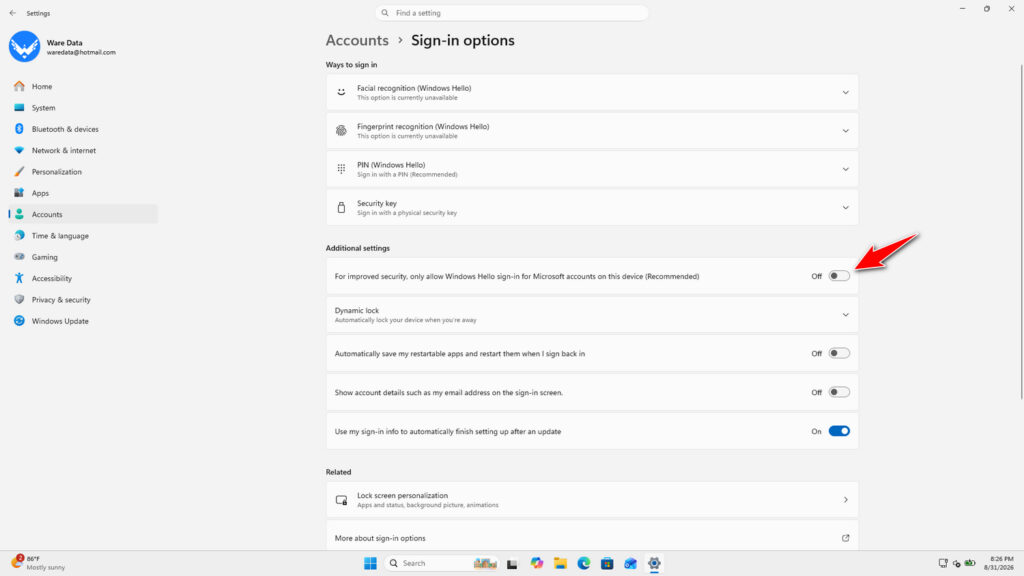
3. In Additional Settings, please turn off the feature “For improved security, only allow Windows Hello sign-in for Microsoft accounts on this device (Recommended)“.
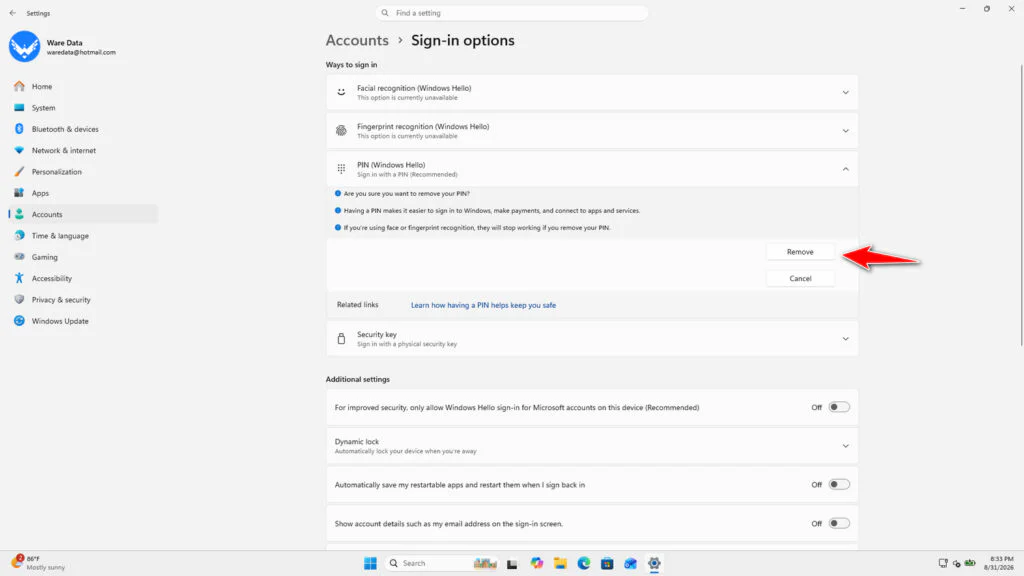
4. After that, the “Remove” button will be active; if the Remove button is not active, you can close the window and reopen the Sign-in options menu. Then, click the Remove button.
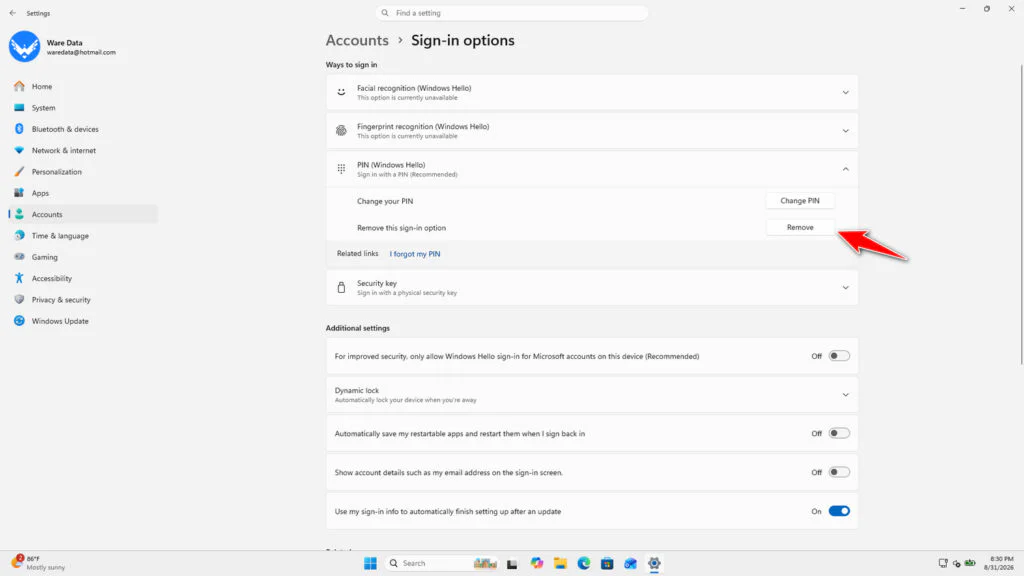
5. To confirm, click Remove again.
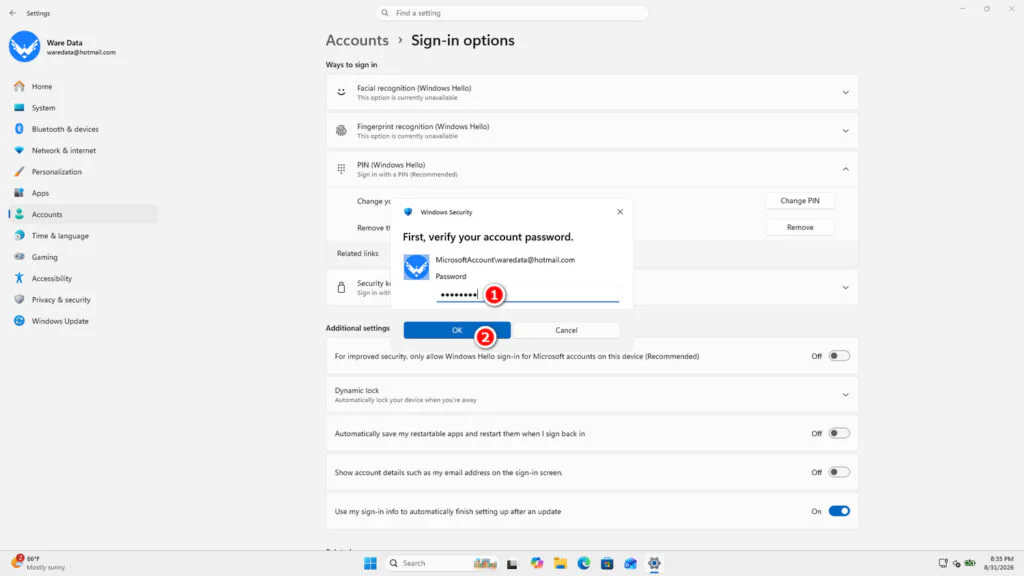
6. Enter your Microsoft account password and click OK.
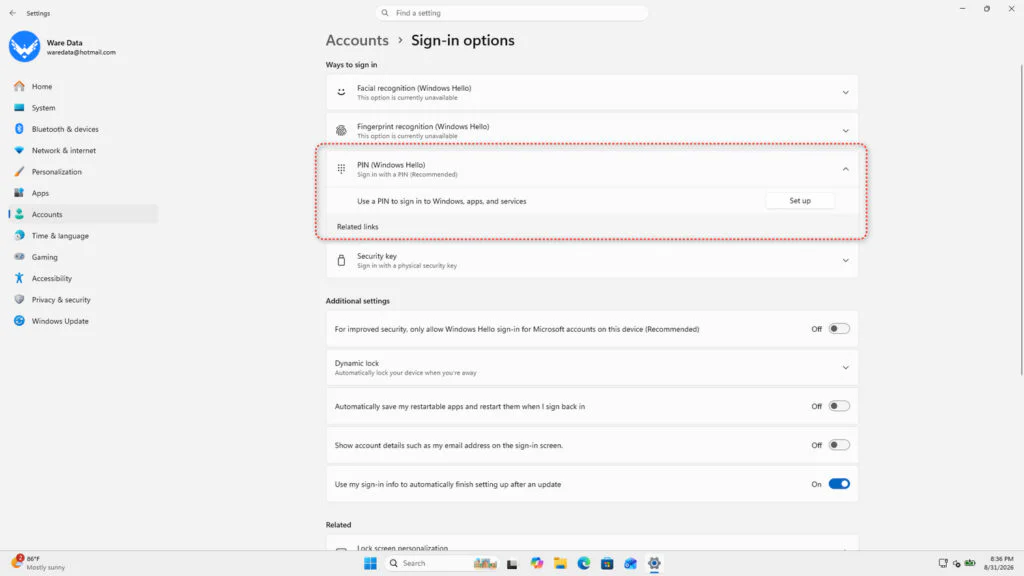
7. After the PIN is deleted, the PIN menu interface will look like this.
8. After that, you no longer need to log in to Windows 11 using a PIN, but if you also don’t want to use a password, you can see the guide in this YouTube video.
If you are still having difficulty with the guide article on how to remove a PIN in Windows 11, here we have added a video format that you can watch as your guide.
Maybe you would like other interesting articles?